HAIKU*
Many fucks were said
Almost a What the Fucker
Protection? What's that?
Many fucks were said
Almost a What the Fucker
Protection? What's that?
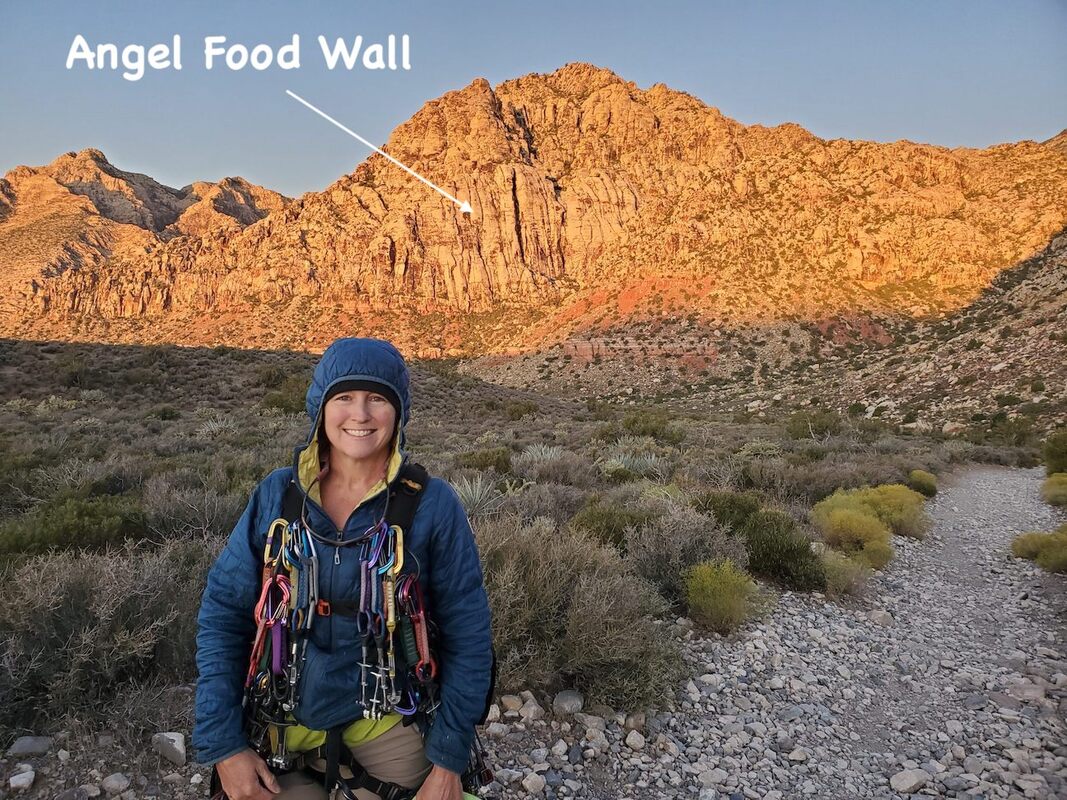
DATE: September 20, 2019 WALLS HIT: 1 (Angel Food) NUMBER OF CLIMBS: 1 NUMBER OF PITCHES: 6 (some do it in 7) NUMBER OF FALLS: 0 NUMBER OF TAKES: 0 VERTICAL FEET CLIMBED TODAY: 775 TOTAL VERTICAL FEET ON THE TOUR SO FAR: 2,640 NUMBER OF CLIMBS REMAINING: 210 VERTICAL FEET REMAINING: ~47,522 DIRTY UNDERWEAR ENCOUNTERED: 0 (I'm surprised we didn't find any considering the very run-out and serious nature of this big climb.) DIRTY UNDERWEAR ENCOUNTERED TO DATE: 3 |
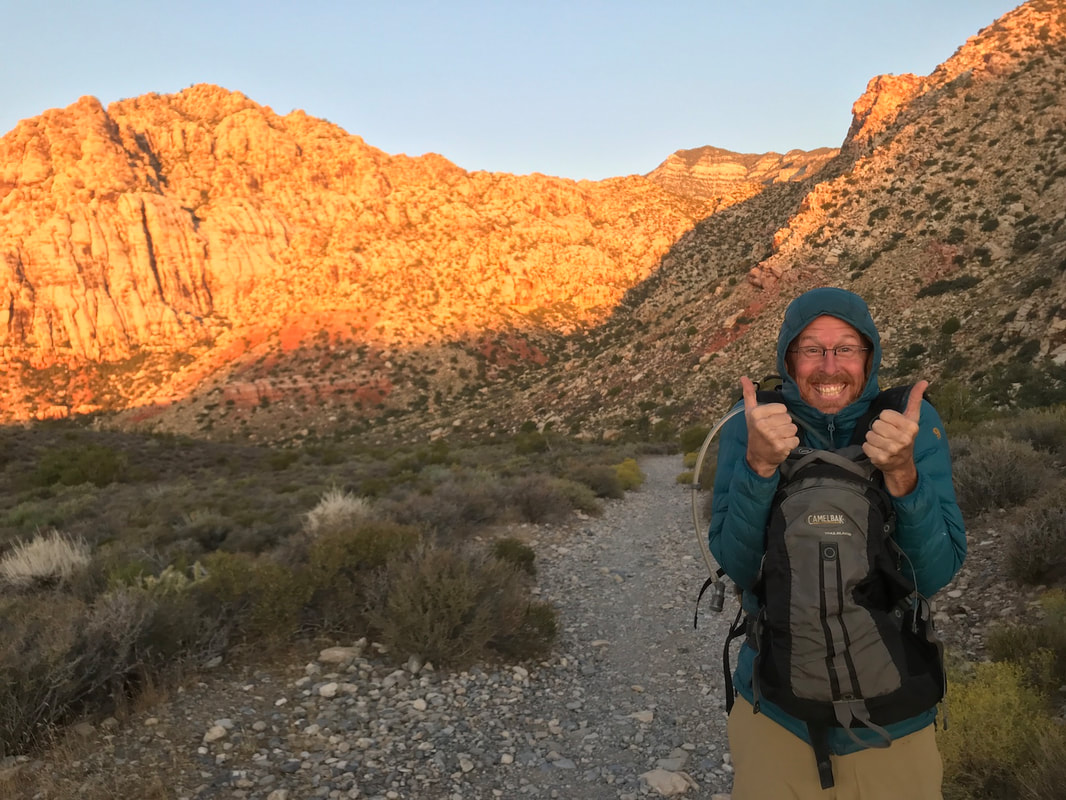
Rick is happy about the cooler weather... and he doesn't know what we are in for yet...
START & END TIMES:
|
|
Conclusion WTF? What the FREAK-OUT!
This is a serious, old school climb folks (established in 1974 by Herbsts and team). Trad climbs with no bolted anchors have a high commitment level as it is, and this climb has both high commitment and high consequences. This climb is NOT for the new trad leader nor the faint-of-heart. We consider ourselves pretty darn experienced climbers and there are some admittedly quite freaky aspects of Group Therapy. Are there some amazing pitches and features? Definitely. Is the rock quality good? Definitely. But in our mind, those elements should not outweigh the other very real and very serious aspects of this climb. I think people sugar-coat shit sometimes in Mountain Project. Perhaps this is because they either don't remember the full experience after the fear has worn off or the high from the send dominates the chemical pathways. Or, perhaps they don't want to openly admit on a forum that a climb made them pucker. |
|
Here are a few things we encountered with this climb.
- Run-out: We frequently experience run-out while climbing, and, without a doubt, this climb has more than its fair share. The majority of the pitches are quite severely run out with 20-60+ feet between pro in many places (e.g. on the last pitch I, Stef, placed 3 pieces in ~130 feet). If you have ANY discomfort with runout, do not lead this climb!
If you read the Mountain Project comments you will see comments about the run-out again and again. You will also see it coupled with comments like "but it's on mostly easy terrain." True, but run out on "easy" terrain can still be freaky and consequential...not to mention "easy terrain" is quite subjective. But, there is also enough hair-raising run-out in not-so-easy terrain that it significantly raises the seriousness level (especially the chimney/roof pitch - our pitch 5). - Route Finding: Route-finding is always best in 20-20 hind-sight. Things seem more "obvious" afterwards. (The same is true for people's memories - i.e. things don't seem "that bad" after the shit has settled...) But the reality is, when you are in the middle of the climb trying to figure out which way to go, route-finding is not that easy. This is especially true if there are no bolted anchors or clear features to guide the way.
In many cases, the wall shape may not allow you to see the "big picture," which was what we encountered on this climb. Also, Group Therapy requires a lot of traversing to get from one crack to the next (with no protection in between). A major challenge is, you can't necessarily see one crack from the next while you are leading. I had to rely on guidance from Rick saying vague statements like "uh, I think you have to go waayyyy left to get to that next crack." Judging when to "cut left" relative to the terrain and your last piece of pro can be guess work at best (unless you've done the climb before).
Then, if you are 20 or 30 feet above your last piece of pro, not knowing if "go left" is the "correct way at the correct time" the stress level escalates. Often, the reality is finding a place for protection guides the next immediate steps. But, that may not be the way you need to go for the climb. This happened several times for us, resulting in having to veer left more sharply than ideal. Despite putting on extra long runners, the traversing still resulted in significant rope drag.
Perhaps the fact that I kept getting off track really affected my experience of this climb,
- Rope Drag: Rope drag is a bitch any way you slice it. But, some rope drag is worse than others. Rope drag was consistently problematic on Group Therapy. Some of our early pitches were actually dictated by rope drag. One of the pitches I lead (P4) it was one of the worst rope drag experiences I've had to date. It literally took all of my might just to step up for each next move.
The rope drag is bad because:- Featured and lower angled terrain: This climb is all 5th class, but undulates from lower angle slab-type terrain to vertical. The rope not only has to drag across large expanses of sticky sandstone slab, there are lots of features like knobs and chicken heads to constantly catch the rope.
- Very long, rope-stretching pitches: The longer the pitch, the more weight of the rope you bear, so this adds to the rope drag.
- The climb zig-zags across terrain. Extra-long runners help, but sometimes not enough. You have to get your traversing angles correct to minimize the drag from this variable and that's difficult to do given the route-finding issues described above or simply wanting to stay on more favorable terrain given the severe run out.
- Rope Stretcher: The advantage of trad climbing is that, as long as there are enough cracks and features, you can stop and build an anchor wherever you wish. This means you can climb super long pitches or break up the climb into more pitches than described in the guidebooks (more on the pitches later). Often climbs have somewhat natural places to start and stop, dictating the pitches. For the first half of the climb we either missed the "obvious features" because we were so far off track, or what one person called a "ledge" resembled more of a non-distinct pimple. But still, many of the pitches were, by necessity, very long (because of where you could actually place protection for an anchor.)
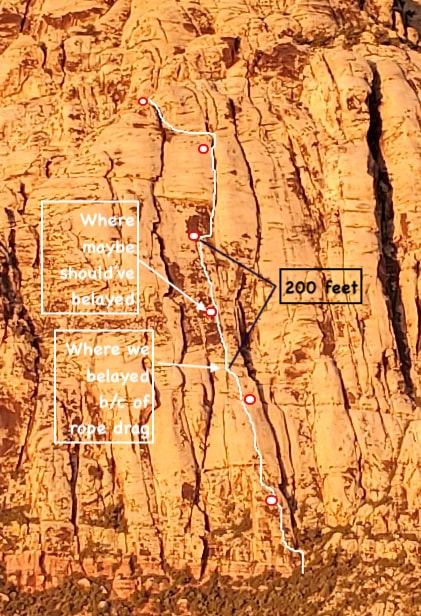
There is one section of the climb (our pitch 4), which is the only place that is actually straight up a crack without traversing or meandering. From the bottom of this pitch you can see a couple of trees, making a seemingly natural end-point for the next belay. From below, the tree looks deceptively close - it actually is about 200 feet away. Many people in Mountain Project reported having to simul-climb this pitch to get to the belay, with a 60 meter rope (we usually use a 70m but this time we were climbing with twin ropes) and we ended up having to do some simul-climbing too (again not a beginner move!).
It is important to get to this belay station (or higher) for the next pitch, which is another rope stretcher and has NO PLACE TO BUILD AN ANCHOR (read run -out) until you get to the alcove below the final pitch. - Chimney/Roof Crux:The next to the last pitch (our P5) is the chimney/roof/off-width crux. This is strenuous, run out, difficult to protect, and it will test your lead head, gear placement, and climbing technique skills. This is old school 5.7. It is NOT a walk-in-the-park. This requires a strong leader.
Pitch-By-Pitch
First thing I'm going to say is our beta doesn't mean shit. For all I know I climbed half the climb off-route and all my bad runout experience was because I did it wrong. Consider this a regurgitation of our experience that may or may not be helpful to anyone.
The second thing I will share is, nothing was "obvious" to us until about pitch 4. Either we completely missed some major keys, clues, and queues described by the guidebook and Mountain Project beta, or they overstated the "obviousness" of things like ledges and cracks.
I also do not know how we ended up doing this climb in 6 pitches instead of 7. We were not purposefully trying to combine pitches. In fact, I felt like I had to truncate a pitch, stopping to build an anchor "early" because of rope drag (see the topo where I noted where we belayed because of rope drag.) In hind sight, I guess it wasn't "early." In Mountain Project people talk a lot about combining pitches - even whittling it down to 4 rope-stretching pitches with a 70m. All I can say is those people must have done this climb before and had the beta down to be able to do that (and they enjoy rope drag).
Here goes pitch-by-pitch:
|
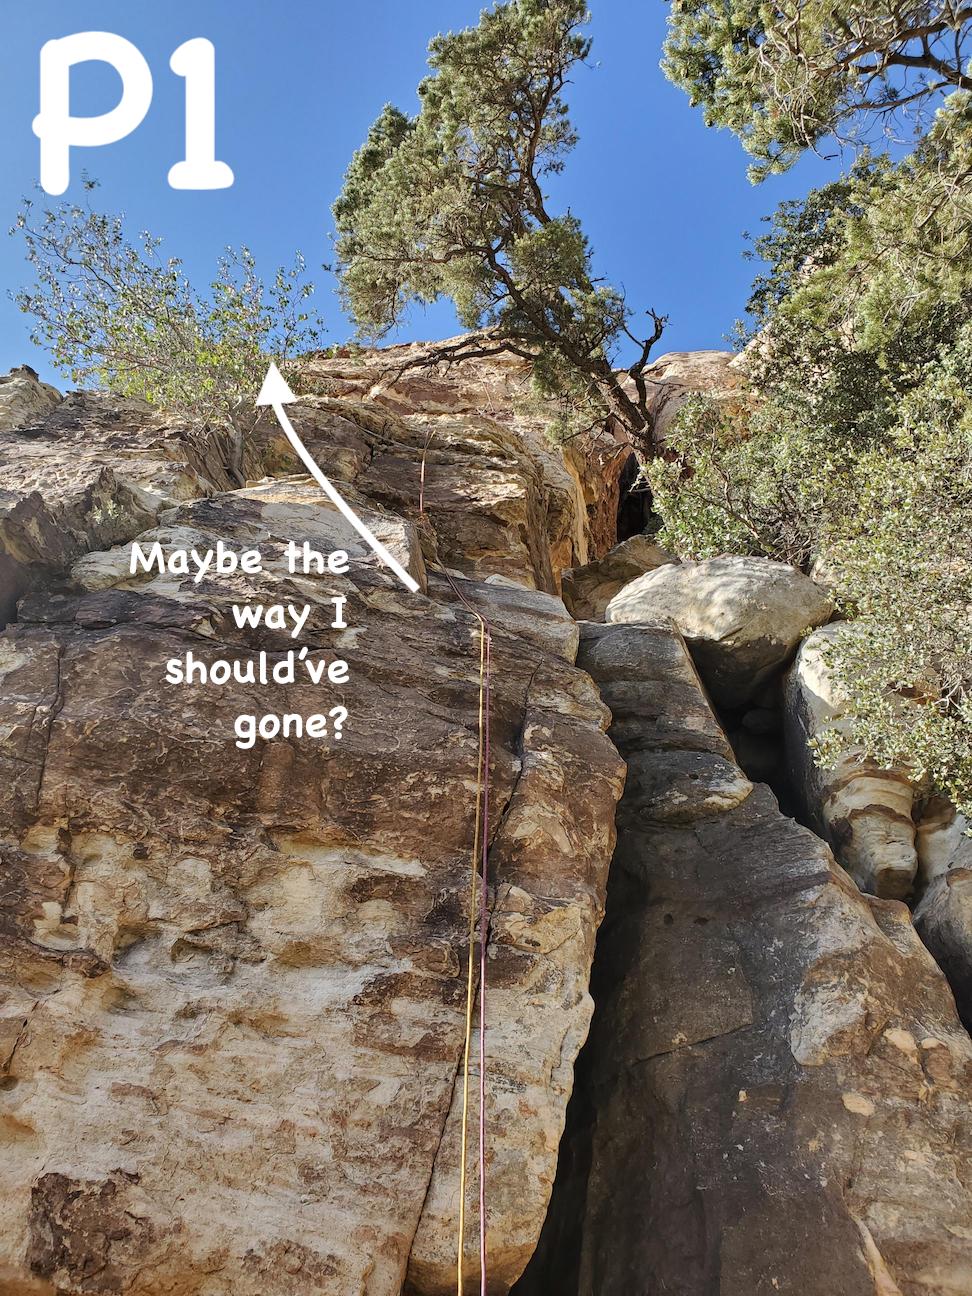
Pitch 1 (lead by Stef - 140'): There is no protection for the first 40 feet. If you find something, it will need to be removed from above so you can traverse quite far left.
I don't know if I started on the wrong crack on the face (the thin crack on the right), but I ended up getting into terrain with no protection. Rick told me there's a crack further to my left, so I set super long slings (4 footers) and worked my way over to another crack. I don't know when and where this crack began, but maybe it's the one I needed to be on in the first place? |
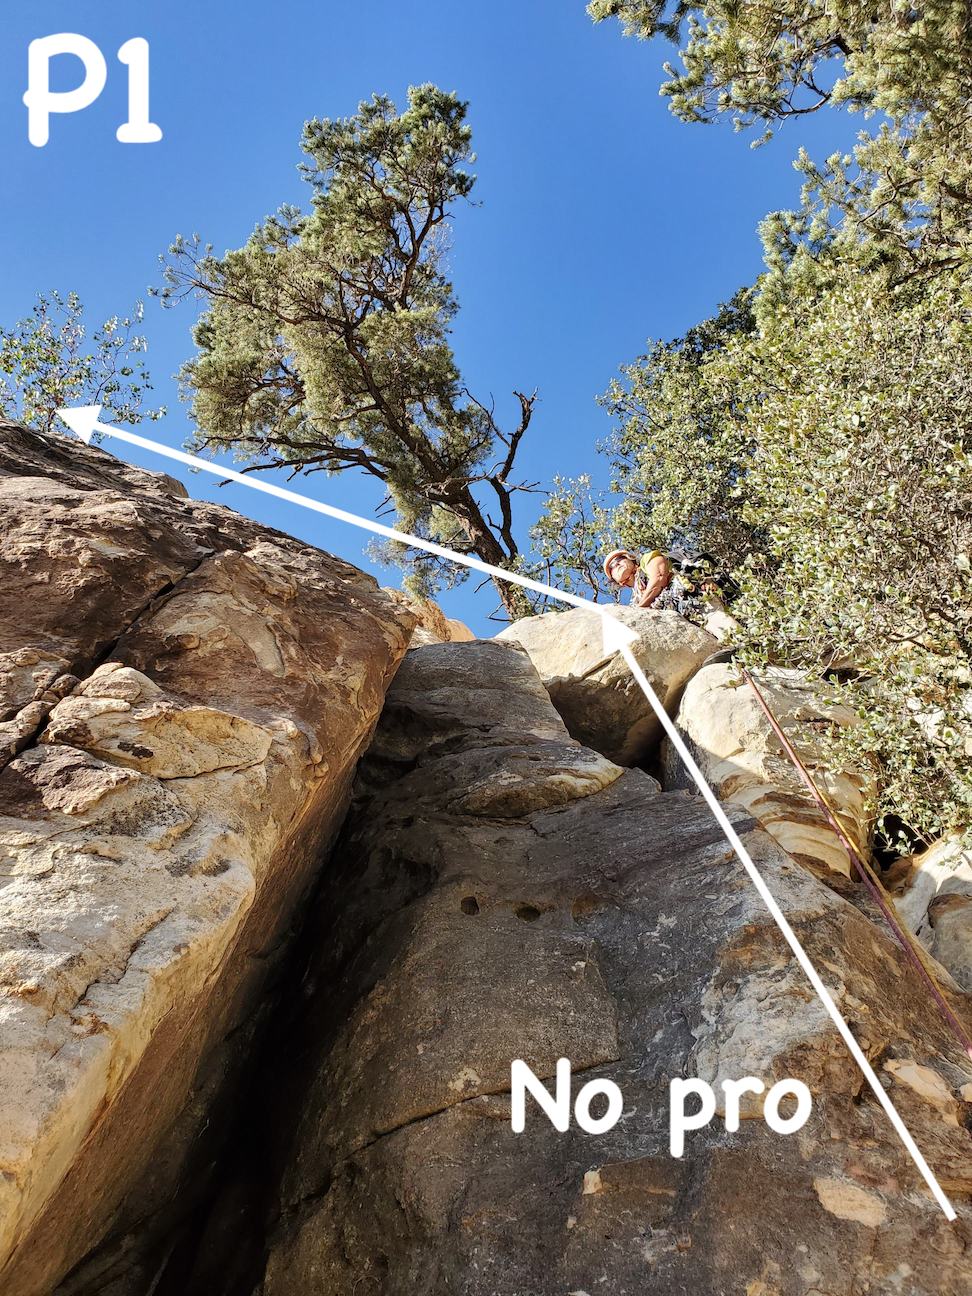
Stef leading pitch 1 - kicking off the trend of no protection in consequential terrain.
|
|
|
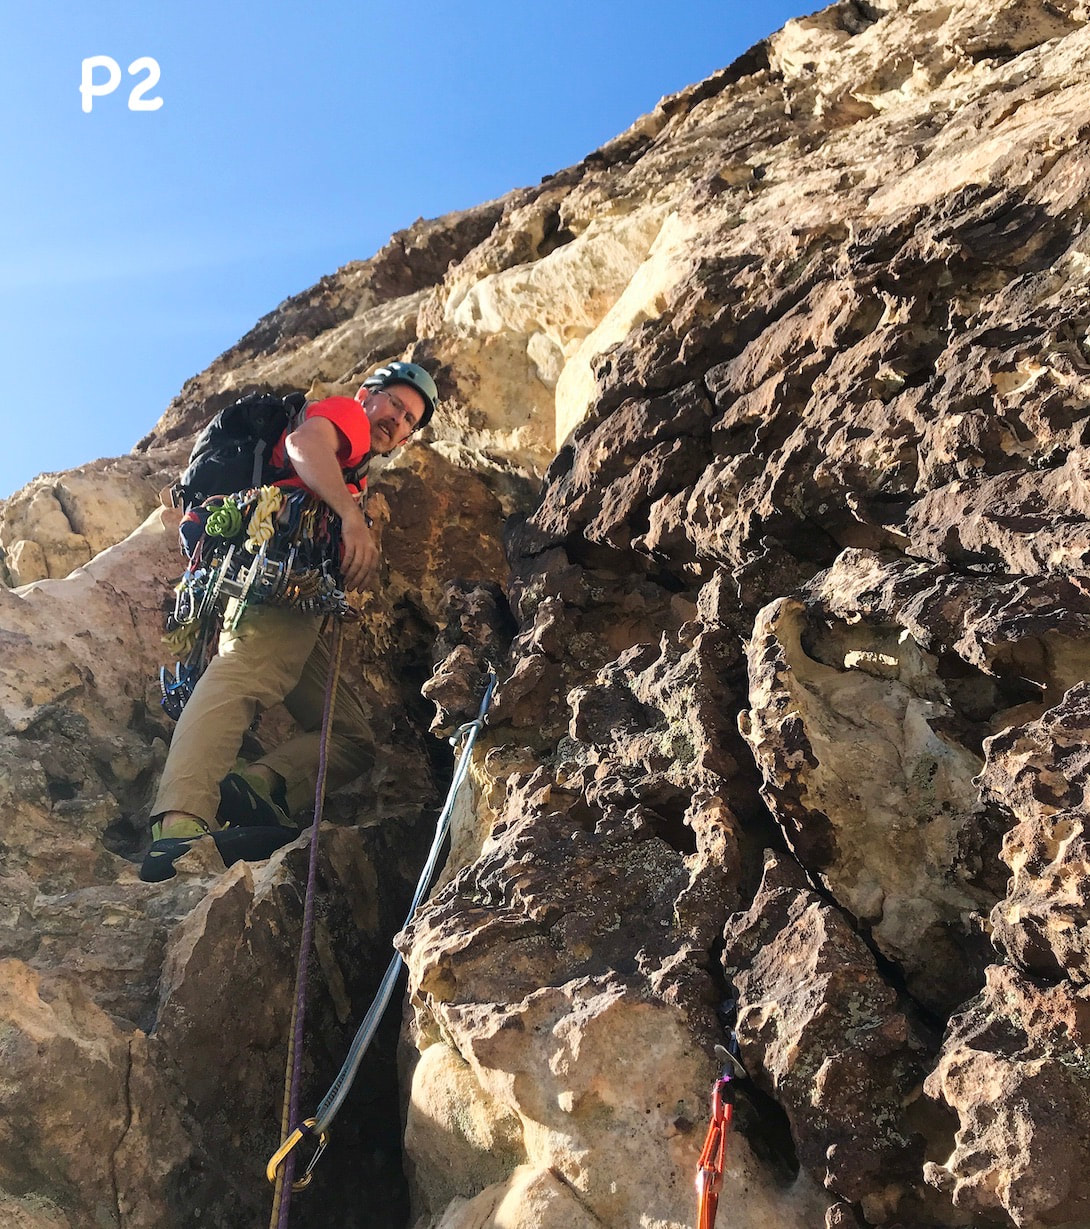
Pitch 2 (Lead by Rick - 100') - Off width crack. What threw me off about this was some Mountain Project descriptions made it sound like it was an all-white face with a big, clean, off-width. There was an off-width here and some white rock, but as you can see in this photo it's a messy, chunky, parfait, rather than smooth vanilla soft serve.
The Handren guidebook says to bring pro to #4 with an optional #6. We had one #5 and one #6 were and they were definitely very helpful here and still run out even with them! Rick used the #5 to bump nearly the entire offwidth section and the #6 came in very handy to protect the upper crux. I heard Rick grunting a lot on this pitch. He kept getting sucked into the offwidth to bump the #5. As a second, I could mostly stay outside of the crack using features along the edges. |
|
Pitch 3 (Lead by Stef - 60') - I could probably repeat a lot of what I said about P1 here. I started off in a crack that died then Rick said "I think there's another crack farther to the left." So, I had to traverse a long distance left unprotected to find another crack. I cut over left too high and didn't use a long enough sling on my last two pieces of pro and I experienced some pretty bad rope drag. I had considered backtracking and down-climbing to switch out slings, but felt that was too risky. Out of necessity, once I reached the other crack, I had to build an anchor. I didn't know it at the time, but the crack where I built the anchor wasn't too far from where I needed to be.
At the time, though, I was frustrated as hell. I could see the top of Rick's head and it looked like I only went up about 30 or 40 feet (even though more rope was out than that because of the traverse.) I felt like my "fuck up" was going to add a small "unnecessary" pitch - turning a 7-pitch climb into an 8 pitch climb. Little did I know, with the way we were doing the pitches, it would end up being a 6-pitch climb.
At the time, though, I was frustrated as hell. I could see the top of Rick's head and it looked like I only went up about 30 or 40 feet (even though more rope was out than that because of the traverse.) I felt like my "fuck up" was going to add a small "unnecessary" pitch - turning a 7-pitch climb into an 8 pitch climb. Little did I know, with the way we were doing the pitches, it would end up being a 6-pitch climb.
Pitch 4 (lead by Stef - 200') - This was the straightest, most obvious, consistent crack I had seen all day. I could also see two trees from the base, one to the right and one directly above to the left. Handren talks about "weaving around the slab above using wide cracks and the faces in between" and ending up at one of the trees (I think it was the right one, which is lower down and at the base of the chimney). Honestly I had no idea where I was, but I had had enough of traversing and weaving and sussing out pro 30 feet above my last piece. I was going to climb a straight, fucking crack damn it. And I was going to end up at the upper tree come hell or high water.
It was strange because the tree looked deceptively close, but that pitch used 100% of our 60 meter rope and then some. Rick ended up having to simul-climb for about 10 feet for me to reach the tree. The rope drag required me to step up with all my might for the last 20 or so feet. A few times I thought I was going to fall backward because of how badly the rope was pulling me down. But I made it - then there was the arduous task of pulling up 60m of rope with rope drag from hell.
It was strange because the tree looked deceptively close, but that pitch used 100% of our 60 meter rope and then some. Rick ended up having to simul-climb for about 10 feet for me to reach the tree. The rope drag required me to step up with all my might for the last 20 or so feet. A few times I thought I was going to fall backward because of how badly the rope was pulling me down. But I made it - then there was the arduous task of pulling up 60m of rope with rope drag from hell.
|
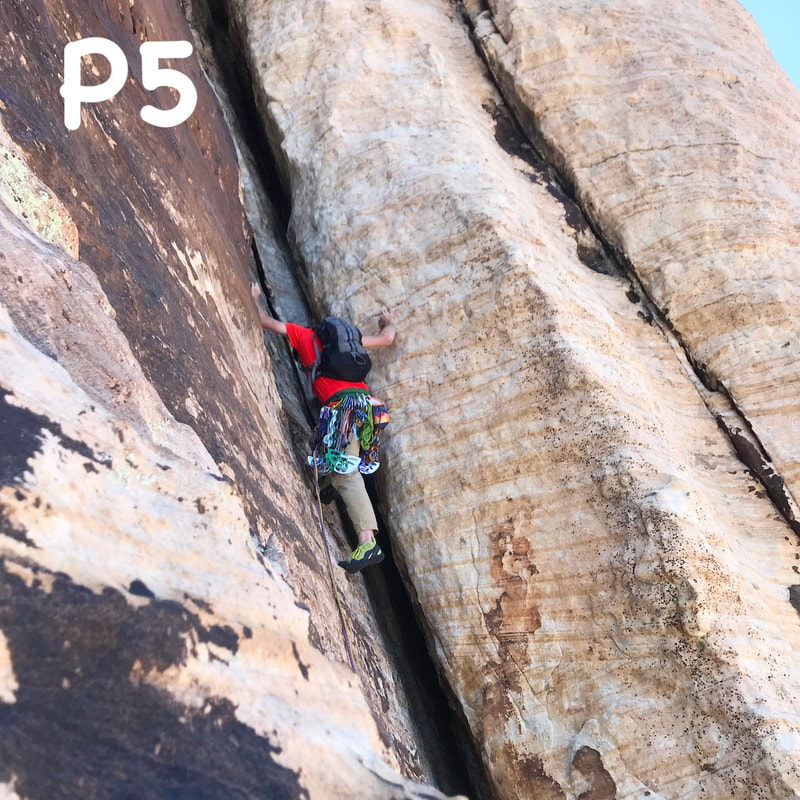
Pitch 5 (Lead by Rick - 150') - The tree where I ended up is about halfway up the first portion of the un-protectable chimney. Rick had to traverse across the slab to gain the chimney and get below the roof. Handren talks about belaying from below the roof, which would probably help with rope drag on this pitch. There are a couple of spots to place pro at the entrance to the roof (a tenuous #6 and a small cam), but a fall would still be ugly. This is a very strenuous, technical, and freaky section of the climb. The demanding chimneying moves continue for a bit then turn into an unprotectable off width for much of the rest of the way. This pitch ends in an alcove. In Ricks words it is: "A glorious, huge, welcome, living room of an alcove to recover from the terror below."
|
|
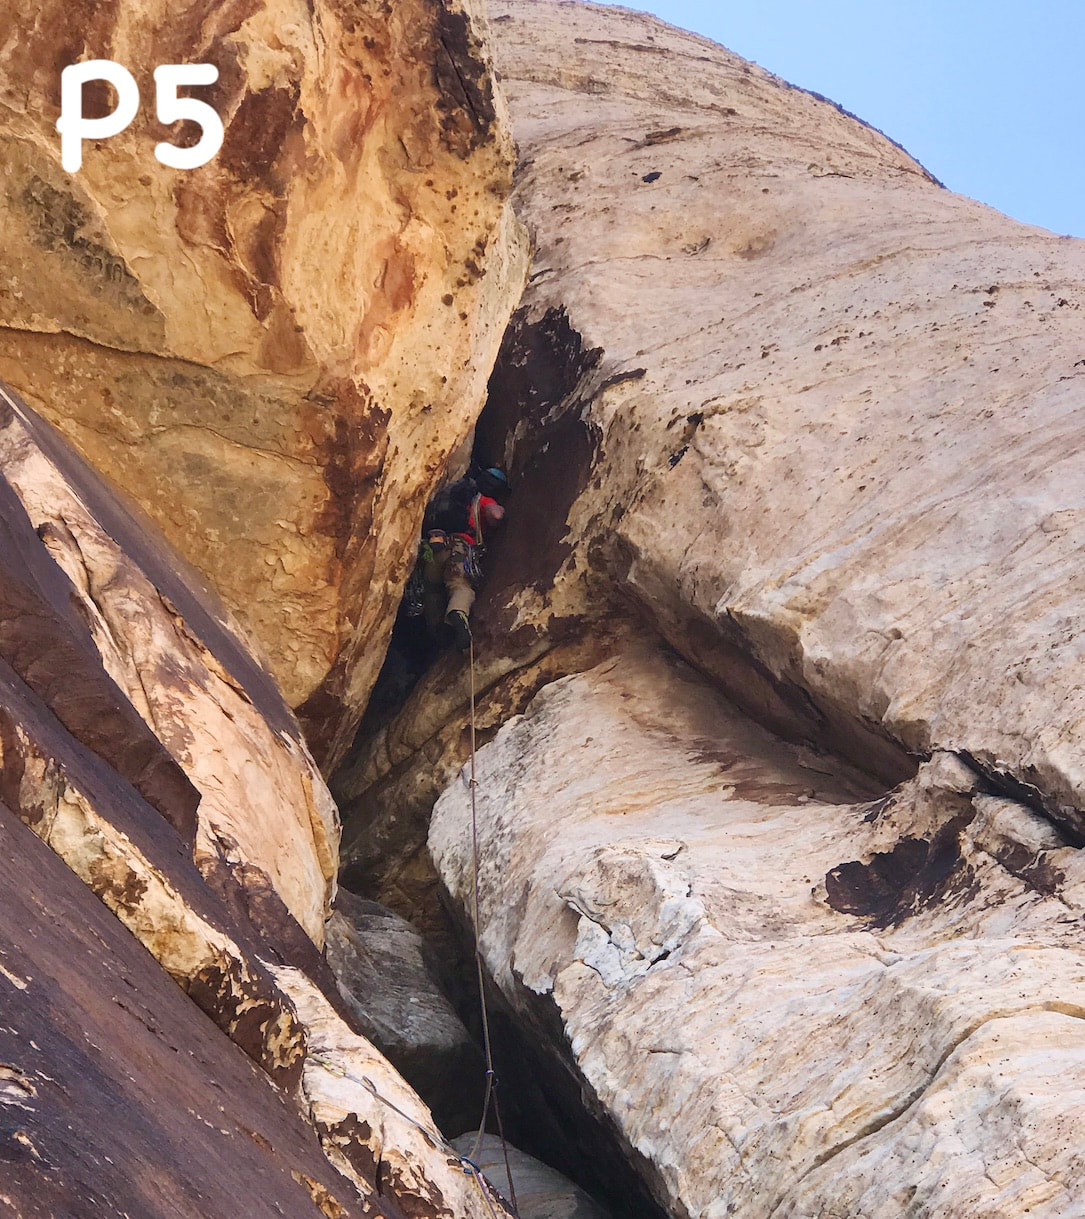
Rick leading the "choof" pitch - the chimney roof. Pretty tricky and heady above your pro.
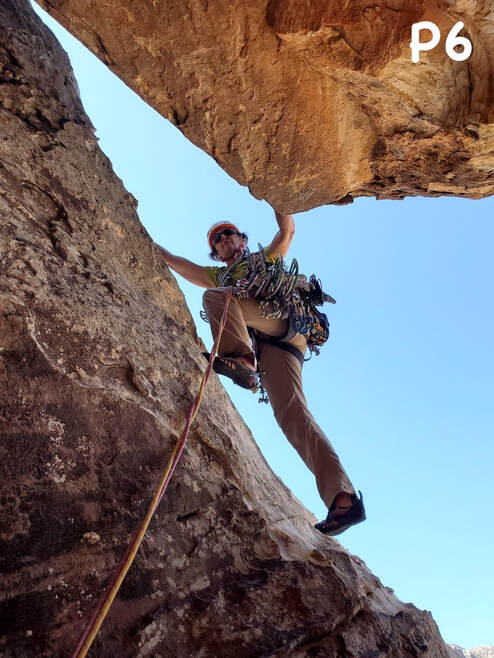
Stepping out of the cave at the start of pitch 6 (the final pitch). There is zero protection for a very long way.
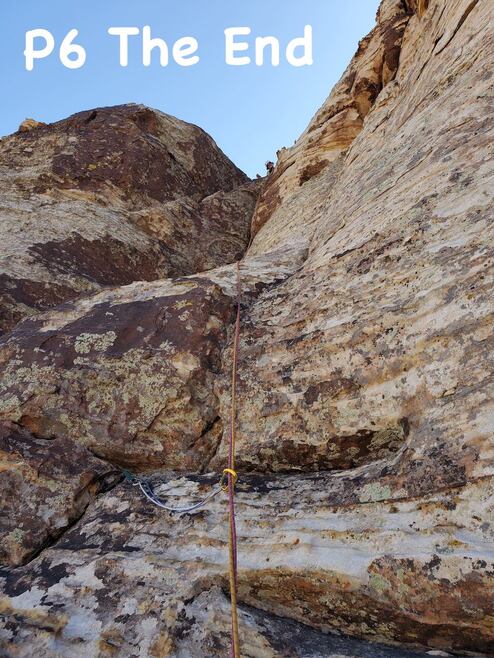
Stef at the top of the final, very run out pitch.
|
Pitch 6 (lead by Stef ~ 130') - I placed 3 pieces in this pitch of the climb. The first 60 or so feet has no place for pro, and you wouldn't want to because of, you guessed it, rope drag. As you can see in the photo you go up and out of this alcove and then step across the opening up above. The rope is coming out up and over across the lip of the rock. I did a long traverse across easy slab and went up wherever it looked protectable and reasonable for climbing. I tried to stay at an angle that minimized rope drag, but it was still an issue. Photo two is past the slab traverse and shows me belaying from above. I have no idea if I took the "correct" path, but I got somewhere safely that allowed us to gain the gully for the decent.
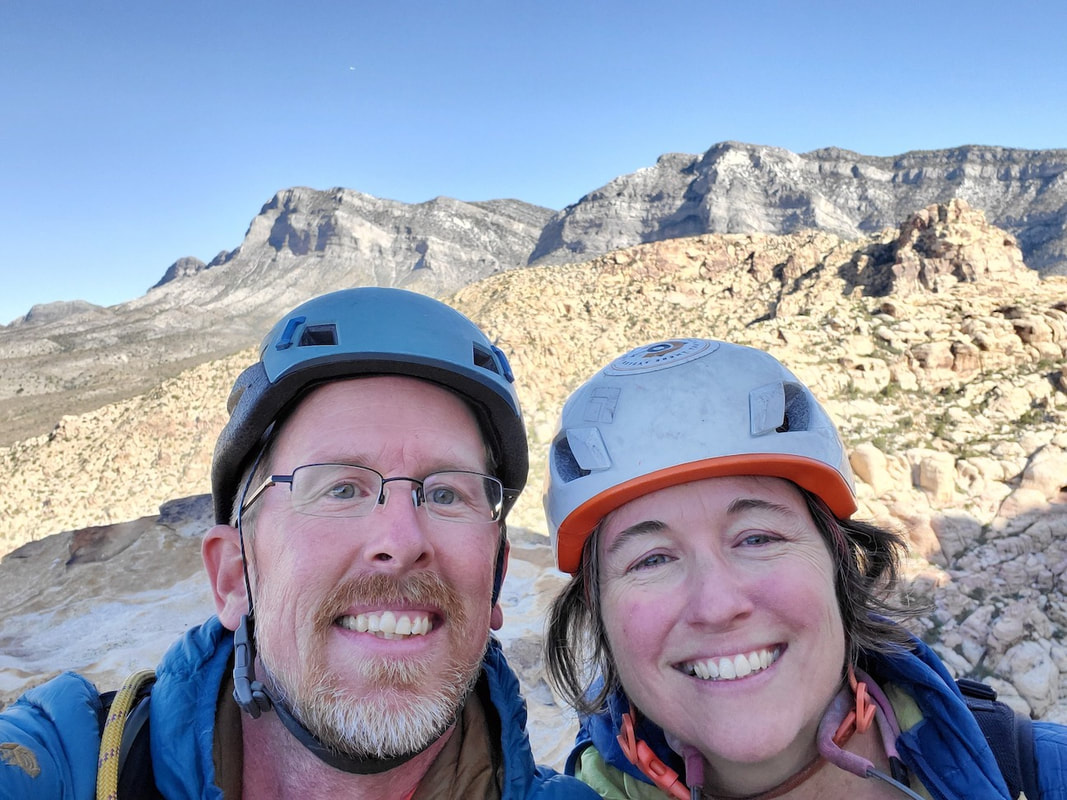
Summit selfie.
The Descent - At the summit head down left towards a tree. Soon you will see incredibly helpful cairns. There was no need to rappel at any point (despite the Handren guidebook saying there are rappels.) There were a few points with "broken" bones potential if you fell, but it's all pretty manageable (especially compared to what you just came up for almost 800 feet before that...)
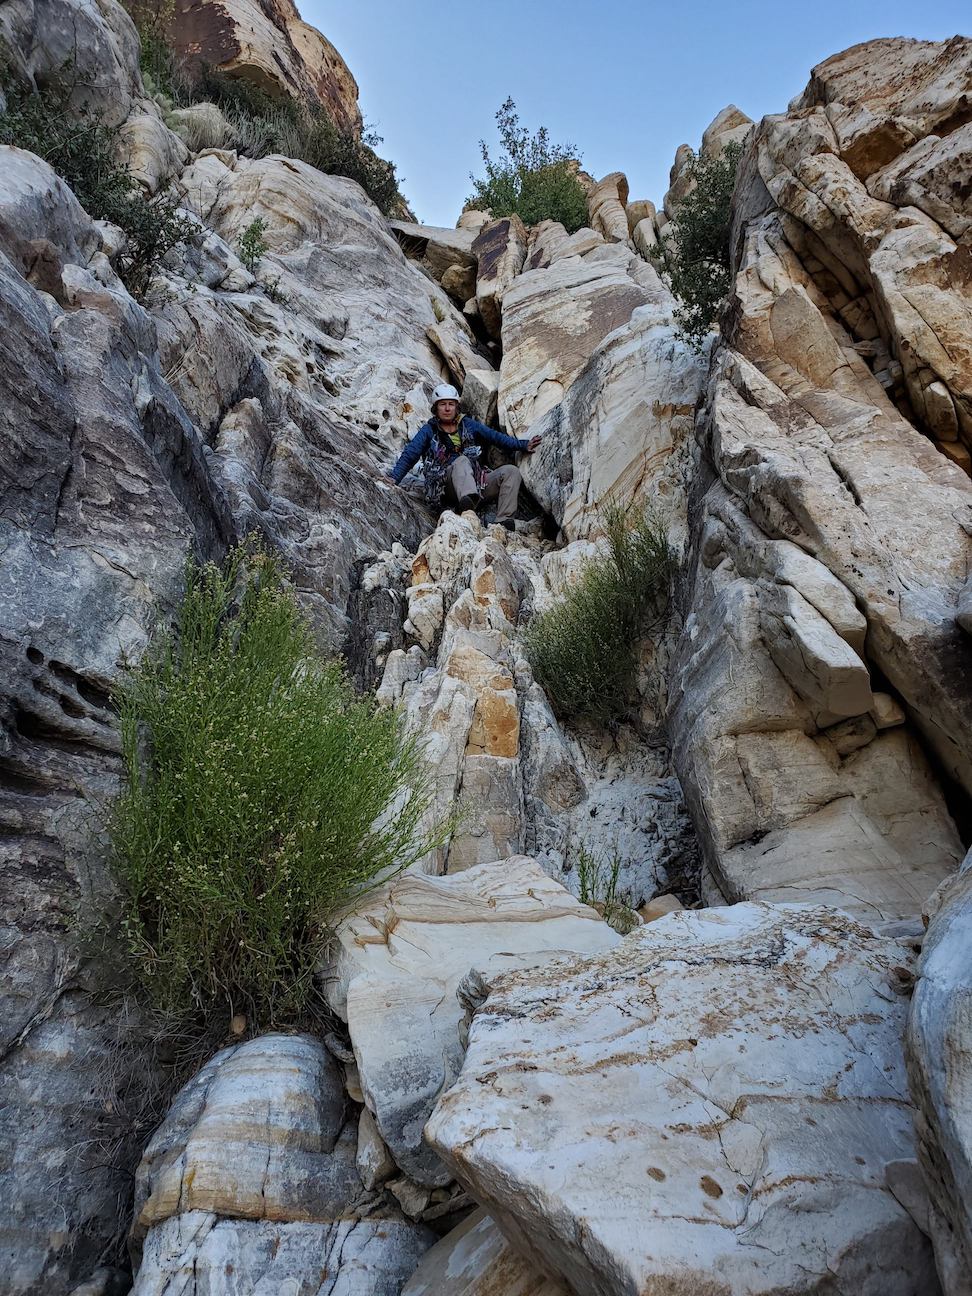
Te decent gulley.
|