SUMMARY HAIKU
What the FABULOUS!
Exposed approach, awesome climb
Three pitches of fun!
What the FABULOUS!
Exposed approach, awesome climb
Three pitches of fun!
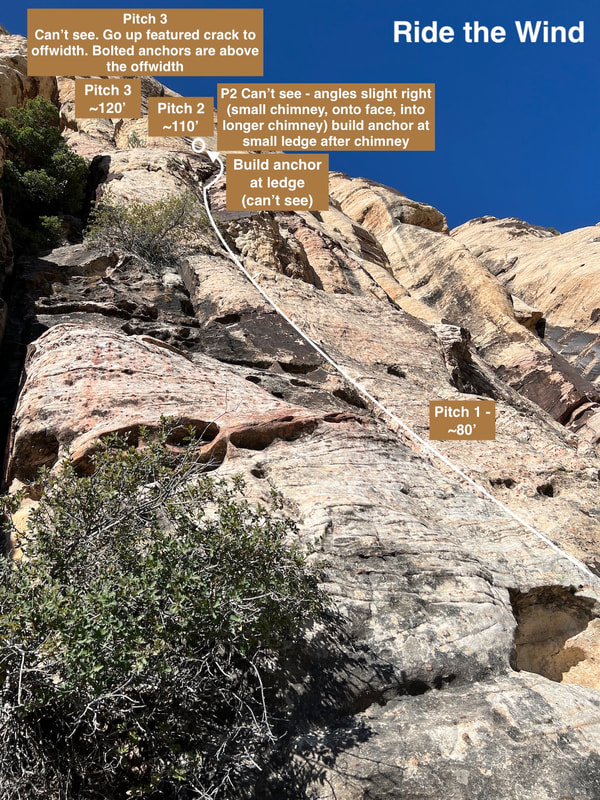
CLIMB: Ride the Wind (Trad, 5.7+) (3 pitches)(~300') (P1 - 80'; P2 - 100', P3 - 120')
WALL: Seraphim (With the exception of Lean Lady, which has an FA in 1978, this is a new wall put up by Bill Thiry, Larry DeAngelo, R. Michaelson in Spring 2022)
PROTECTION: Well protected, pro to 4". You can either bump the 4" up the offwidth (which means grunting in the offwidth) or bring two 4"s and forget the bumping which allows you to stem and avoid inserting yourself into the offwidth.
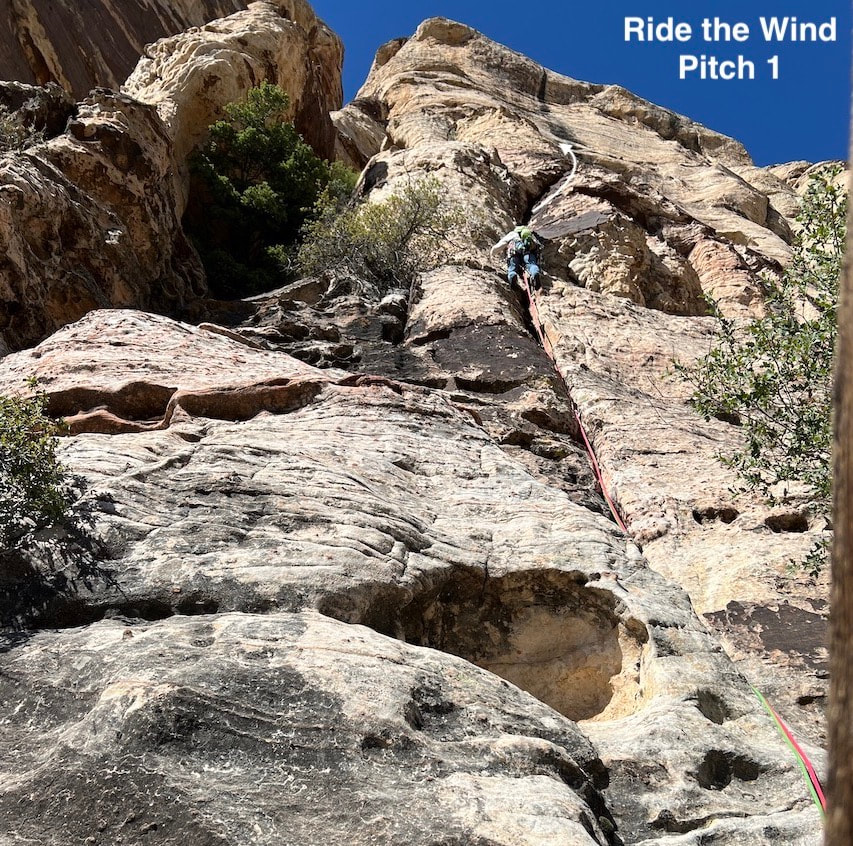
BEGINNER LEAD: Mostly - pitch 1 for sure. Pitch one is shorter, easy, and straight forward. Even thought it is rated a 7+ it's not very +. It's all pretty well in the straight forward 5.7 range.
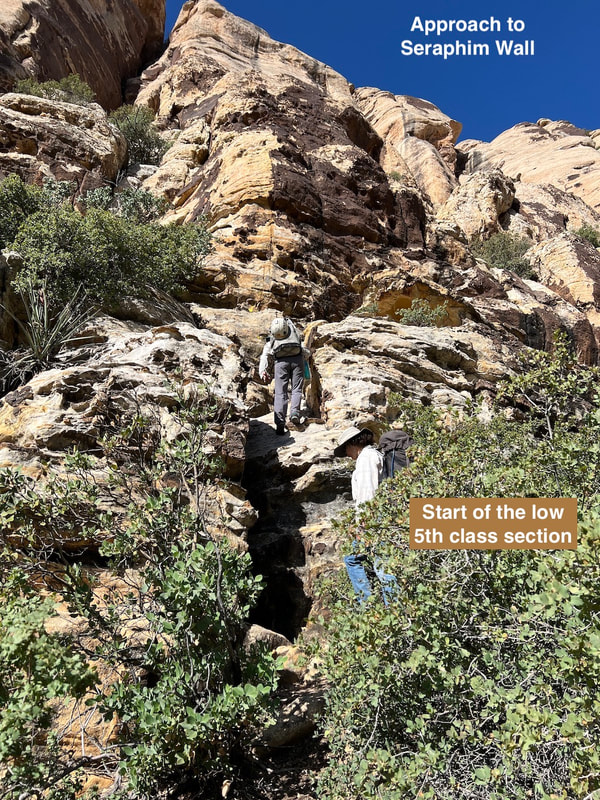
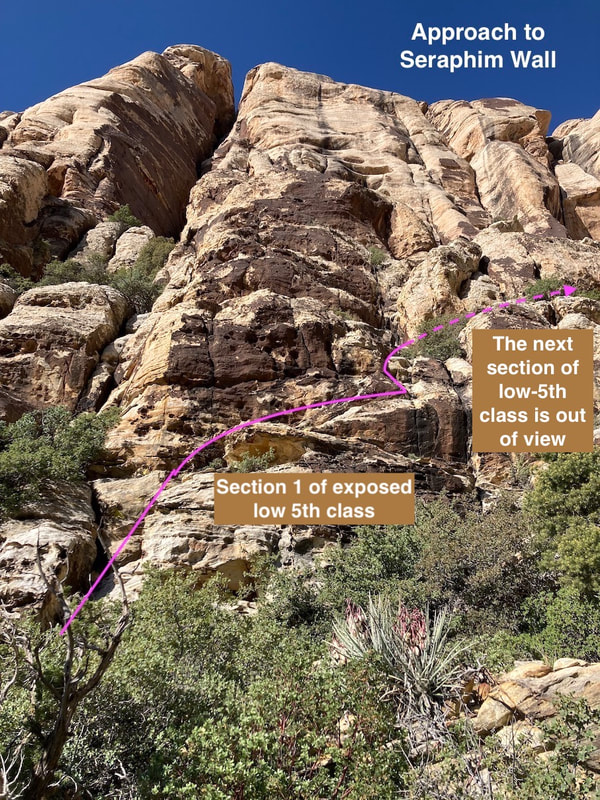
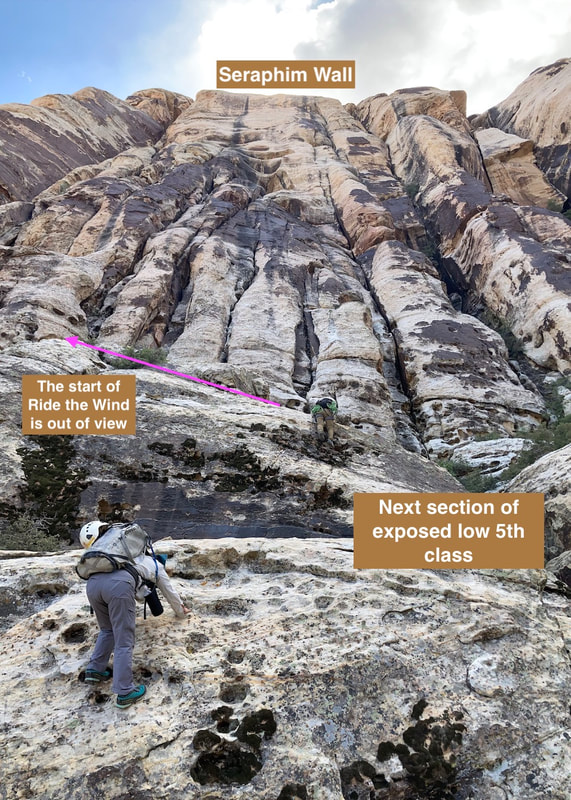
SPECIAL NOTE: The approach does have approximately two ~40 foot sections of low 5th class climbing and exposure - beware.
Conclusion WTF? What the FABULOUS!
Approach
NOTE: This climb is "What the Fabulous!" but the approach is not for the faint of heart. There is quite a bit of exposed 4th and low 5th class climbing to get to the base of the climb.
Park in the White Rock Springs trail parking lot, which is at the end of the dirt road (the same parking lot you use to get to Angel Food Wall). Follow the White Rock Grand Circle Trail then turn off the trail the way you would go to Group Therapy and Tunnel Vision. (There is a cluster of trees, with a dead tree in the cluster that I use as the clue to turn off the main trail.)
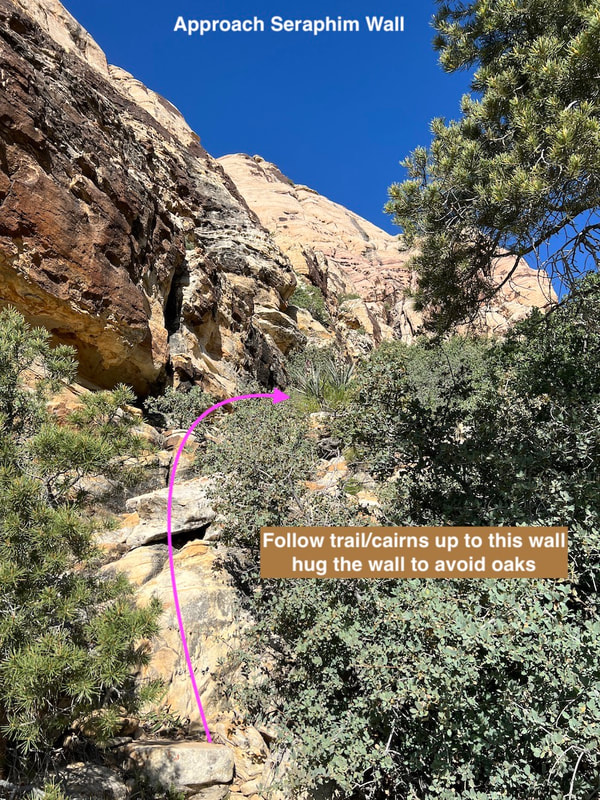
Once you reach the rocky run-off gully, if it's dry, stay in the gully a little longer than you would if the water forced you up. Exit the gully and follow cairns up and to the right. Do not go up to the main Angel Food Wall base, keep heading up and right until you reach a head wall (see photo 1 in the series of photos below - you can click the photos to enlarge and scroll through the series.)
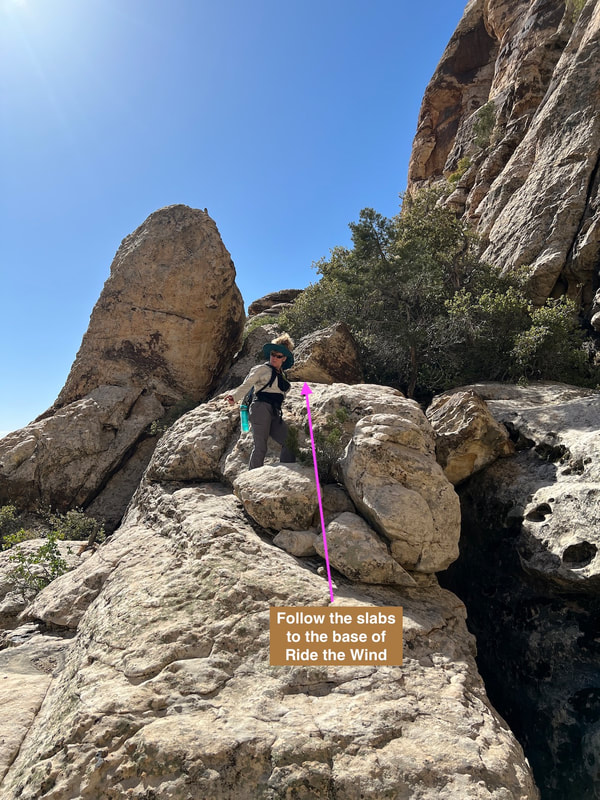
There are some cairns stacked on some rocks near the head wall. Go to this and keep going right hugging the headwall to avoid the scrub oak. Follow this until you locate the first section of exposed 4th class/low-5th class (photos 2 and 3 in the series).
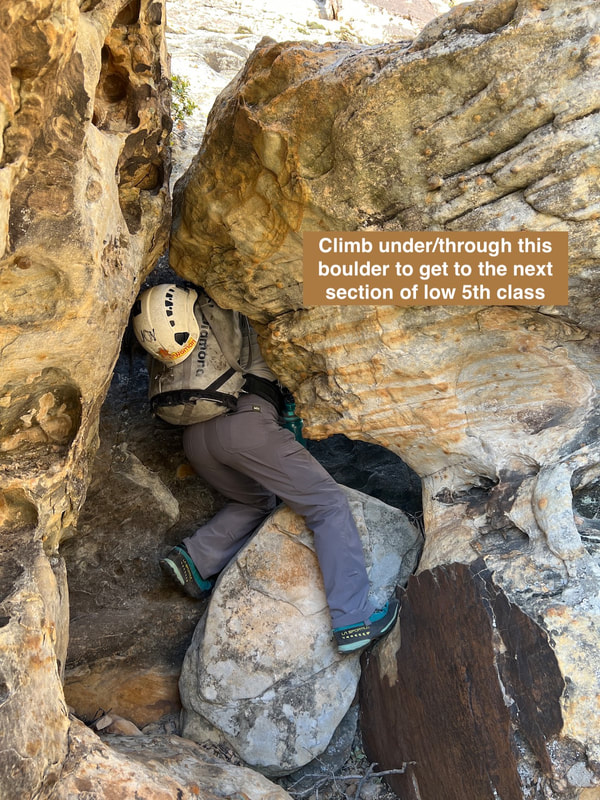
There is a boulder with an undercut and hole. Go through this, then begin the next section of exposed 4th/low 5th class climbing. When you reach the top of where I (Stef) am (see 4th photo - I am carrying the green rope), follow the slabs left and look for the base of the climb in an alcove.
(Click to enlarge photos above)
Pitch 1
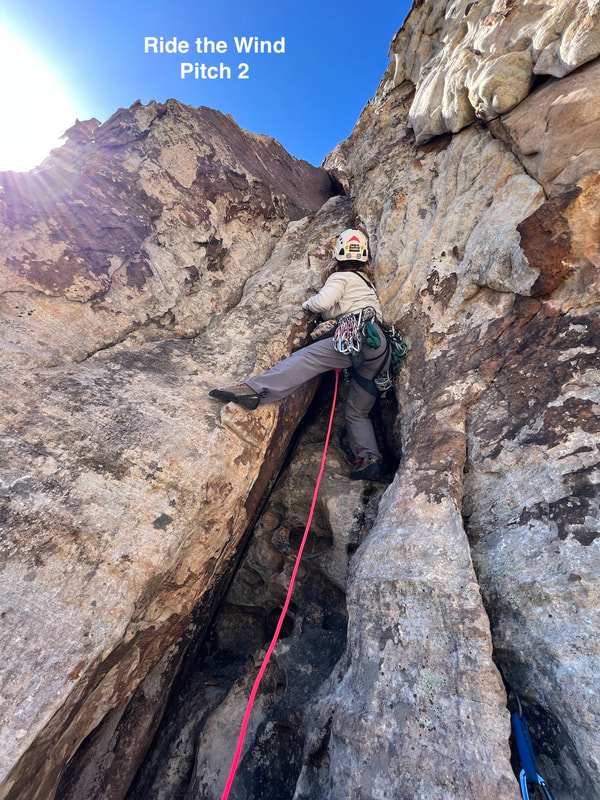
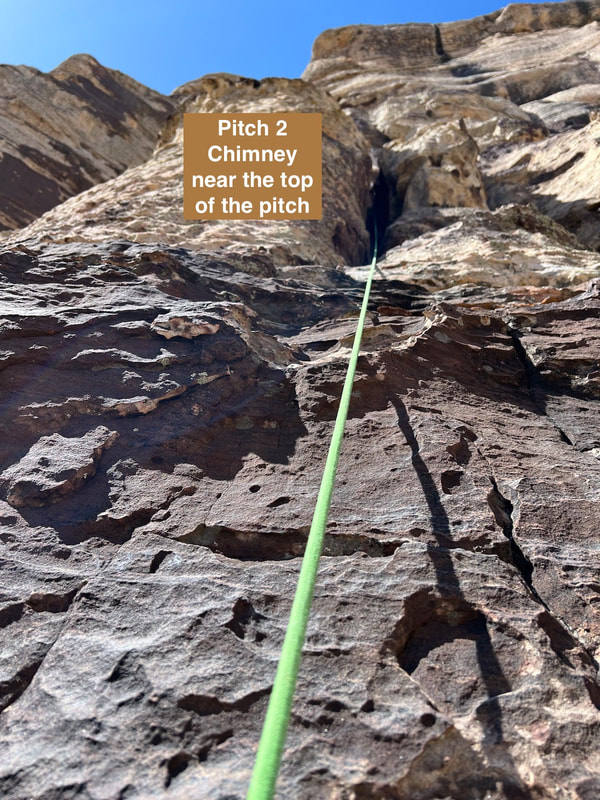
Pitch 2
|
Approximately 100'
The original climb description calls the start of the climb a chimney. It's chimney-ish (sort-of) and requires no chimney moves. Start in the hole (aka chimney) then exit around a small bulge to stem and place protection in the left crack. Continue stemming up then step out right onto the juggy face with dark petina. Follow the face to the next ledge. |
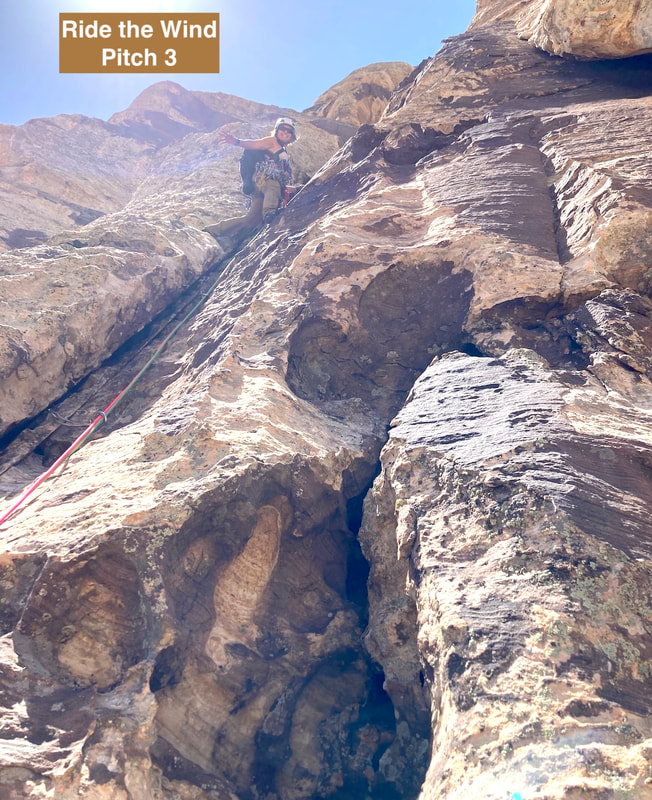
Pitch 3
|
Approximately 120'
Exit the ledge and work your way left to the main crack. Follow solid and featured rock to an approximately 30-foot section of offwidth. Save your #4s for this section. If you have just one #4, you can bump the piece to about 10' below the bolted anchor. Bumping requires you to get into the offwidth. If you bring two #4s then you can place the first one down low, stem up, the place the second one, and stem up (if you want to avoid some grunting and getting into the crack). There is webbing/cordalette tied to the two bolts - so beware, these will degrade over time. Consider bringing spare webbing to replace it with (if the webbing hasn't been replaced with rap rings at some point in the future...) |
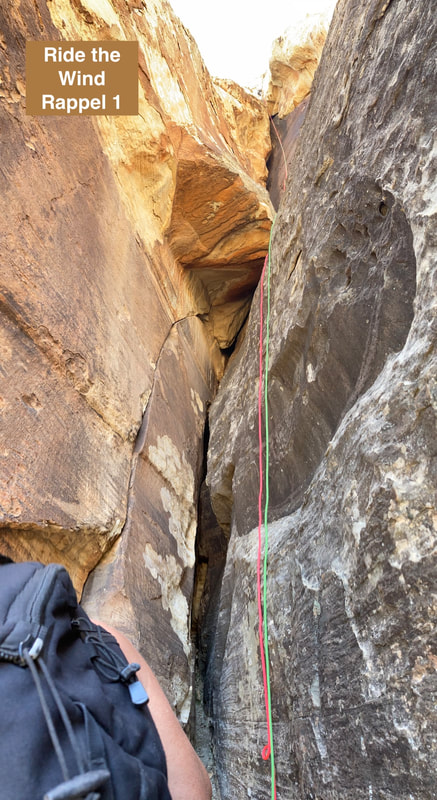
Descent
You can get down in two rappels with one 60m. I do not recommend trying to do this in one long rappel with doubles. You will likely lose a rope.
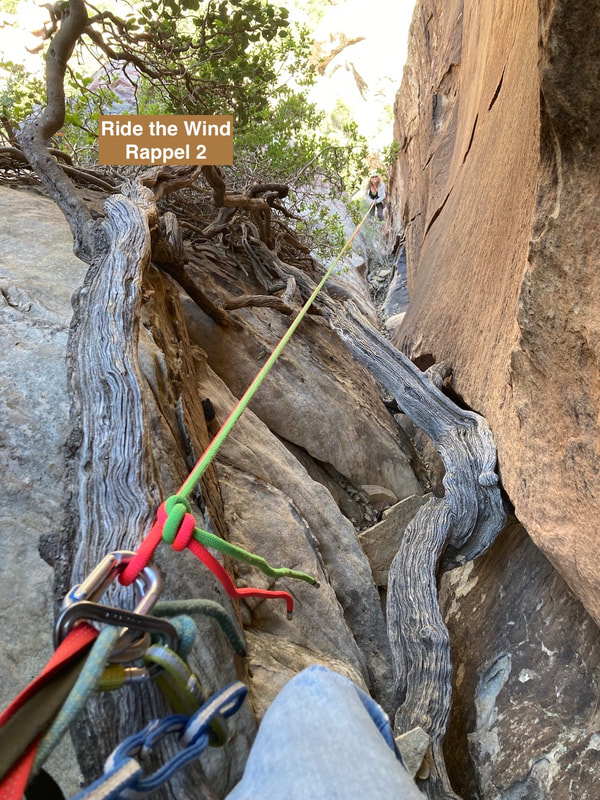
The first rappel goes down the other side of the pillar from where you come up on Ride the Wind (using the anchors at the top of the climb).
Rappel 1: From Bolted anchors to slung tree
Rappel 2: From tree to grove of scrub oak.
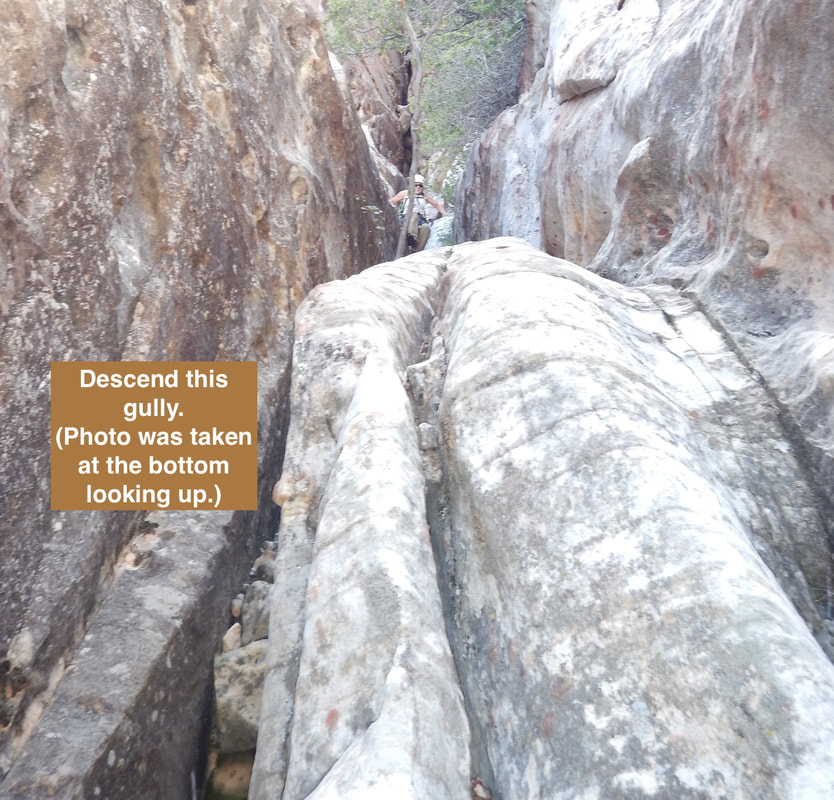
From the scrub oak grove follow the wall (climber's left) briefly to basically get around the scrub oak and gain the walk off. Go down the gully (see photo) at the bottom of this gully section go left and it places you back at the base of the climb.
Climb Stats to Date
|
DATE OF CLIMB: May 14, 2023
WALLS HIT: 1 NUMBER OF 5.7 CLIMBS TODAY: 1 NUMBER OF 5.7 PITCHES TODAY: 3 NUMBER OF FALLS: 0 NUMBER OF TAKES: 0 VERTICAL 5.7 FEET CLIMBED TODAY: 300' DIRTY UNDERWEAR ENCOUNTERED TODAY: 0 TOTAL CLIMBS SO FAR: 187 TOTAL PITCHES SO FAR: 255 TOTAL 5.7 VERTICAL FEET ON THE TOUR SO FAR: 23,285' NUMBER OF CLIMBS REMAINING: 55 (out of 242 - some new climbs have been added...) VERTICAL FEET REMAINING: 28,832' DIRTY UNDERWEAR ENCOUNTERED TO DATE: 8 |
FALLS SO FAR:
|
|
