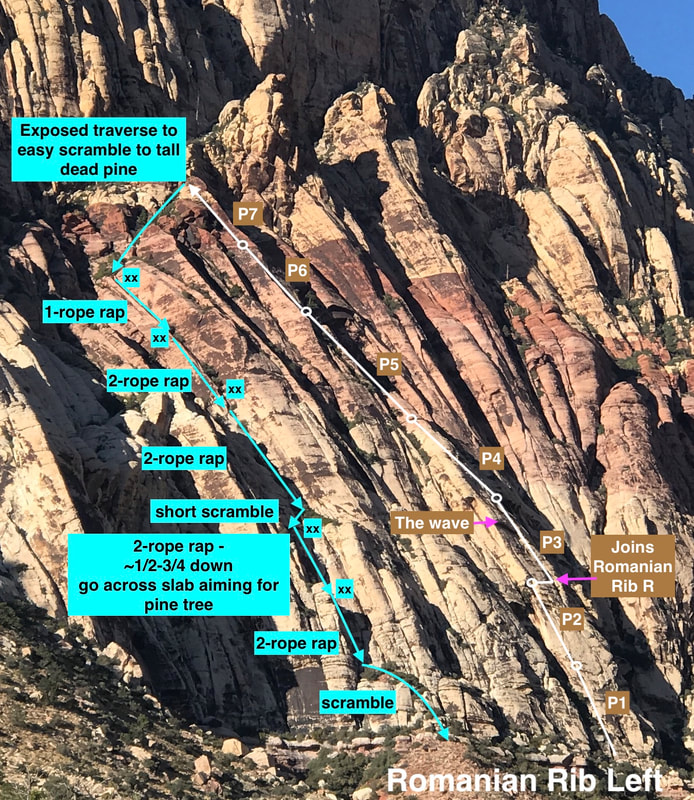
Romanian Rib Left shares approximately 900 feet of the same climb as Romanian Rib Right. The difference is the first ~400 feet (first 2.5 pitches).
Both Romanian Rib Left and Right are rated 5.7 in the Handren guidebook, but rated 5.6 and 5.5 respectively in Mountain Project. The way we went on Romanian Rib Left, there were a few 5.7 moves on marginal rock, so we'd give it a 5.7 (even though most of the climb starting from pitch 4 is in the 5.5 range). We'd give Romanian Rib Right a 5.6 (there are several 5.6-ish moves), again with most of the climb being 5.5.
Of the two climbs (Left and Right), Right is far superior (that one we rated a "What the Fabulous"). Romanian Rib Left we give a "What the Fair." Although Pitches 3 to the end are fantastic (depending on where you start pitch 3), the first 2 pitches (~370-400' feet) are unimpressive enough to lower the quality rating. There is no real "line" so you are left guessing which way to go, hoping there is pro (which in the way we went there wasn't much), with uninspiring (read frail) rock much of the way until you reach the sweet crack that starts below the wave.
We did the climb in 7 pitches with a 60m rope, which required simulclimbing to get ~1200' into 7 pitches. The simulclimbing began with pitch 3 after "The Wave" to try to reach a belay ledge (which Stef still stopped too early) and several of the pitches above.
Keep in mind, with a climb this big you will probably slice it and dice it into your own configuration of pitches based on numerous factors. But there are a few "key spots" that lend themselves to a natural pitch breaks, which we highlight below.
Below is the beta for how we did this climb, including our thoughts on maybe what we'd try next time on the first two pitches. Romanian Rib Right has similar information from pitch 3 on up, just different pitch breakdowns (we did that one in 9 pitches with no simulclimbing because we were climbing with 3 people and there was very, very bad wind.
Climb: Romanian Rib Left (5.7, trad, ~1200' feet)
Wall: First Creek Slabs
Rope Used: twin 60s (highly recommended to bring two ropes for double rope rappels, otherwise you will be doing a ton of rappels combined with downclimbing between rap stations. If you want to maximize the pitches without simulclimbing consider using a 70m and bring a tagline for the rappels.)
Gear: Pro to 4" - Pitches 1 & 2 had "creative" and limited pro, beginning from the crack below the wave, most of the rest of the climb has lots of options for pro (there are some spots with limited pro, but it is pretty low angle)
Good Lead for a New Trad Climber? No. The first ~400 feet of the Left side is probably not great for a new trad leader, as the rock is not great, pro-options are few and far between, and when you find the pro, it has to be creative and the soft rock makes it potentially marginal. From P4 on (above the Wave) it would probably be OK for a new trad leader. But, keep in mind here are no bolted anchors so a new trad leader needs to be comfortable building anchors (sometimes creatively depending on where they stop) and they need to move quickly an efficiently. Once you are on this climb, you are committed and need to finish unless you want to donate tons of gear to get off. Ideally you want to do the complex descent in the light.
Summary: See the intro at the top of this page.
Conclusion WTF? What the FAIR
Romanian Rib Right is much better
The Approach
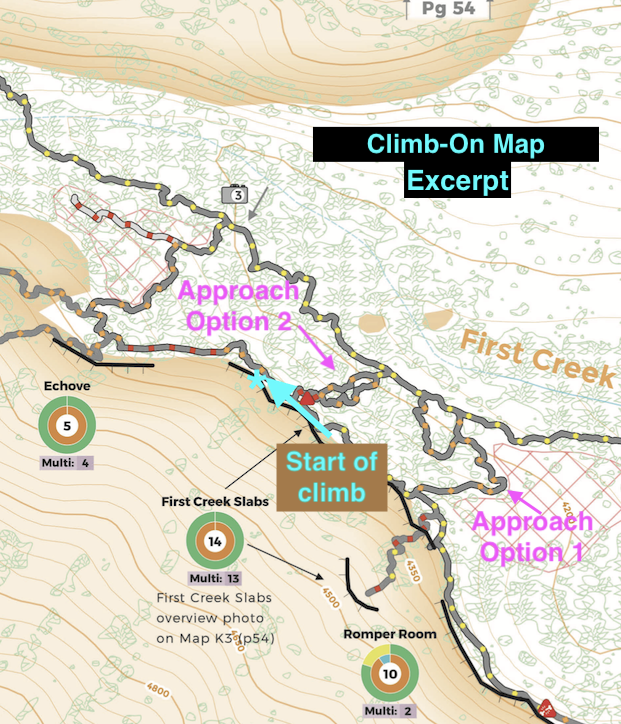
There are a couple different ways to get to the base of this climb.
1. Unexposed approach - Go up to the left side of First Creek Slabs (as if headed to Rising Moons) then mostly hug the wall until you get to the start. Sometimes there is a trail that goes into the oaks, or you can stay above scrambling and hugging the rock.
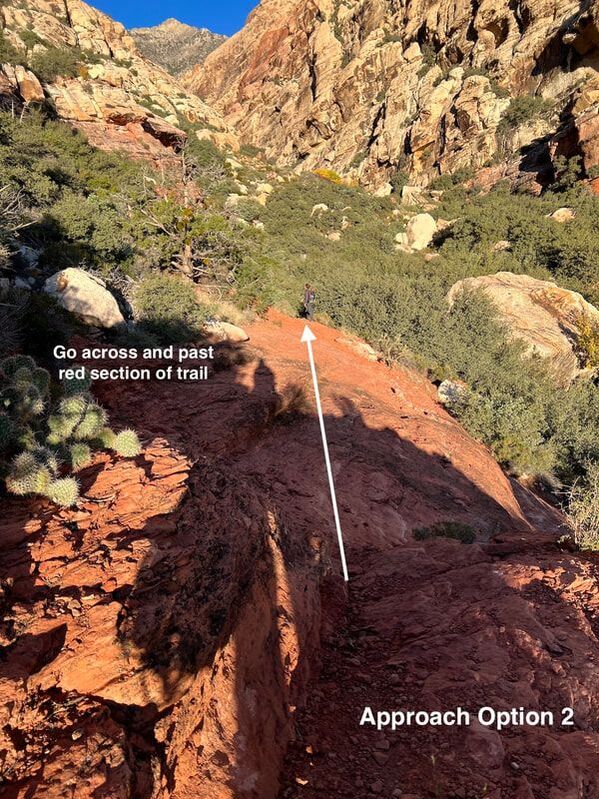
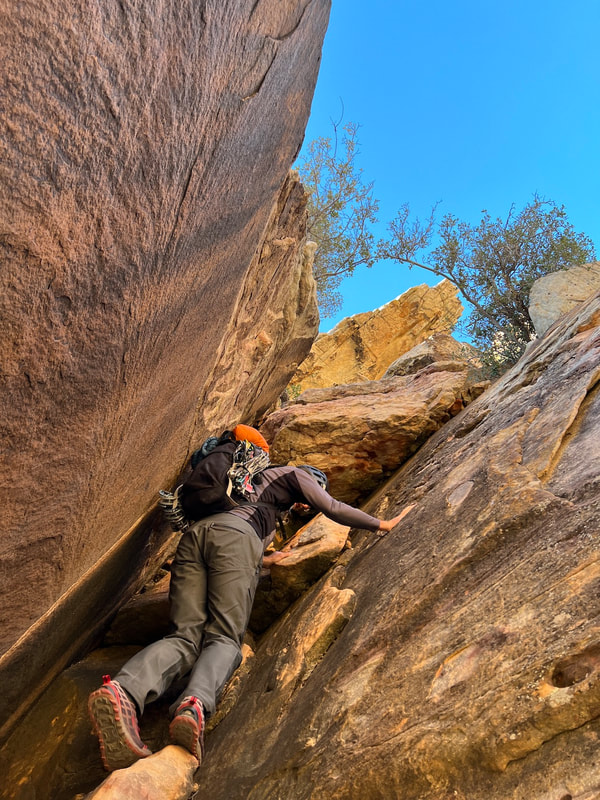
2. Exposed approach - Stay on the mid-tier trail, crossing over the red rock (the trail turns bright red) then cutting up towards the wall via a short exposed low 5th class section. At the top of the low 5th class section turn right to find the start.
Pitch 1 (~195 feet)
|
The line or way to go on this pitch is not clear. People talk about going up the face (which looked mostly unprotectable as I started to go up it) or following the line of least resistance (which has multiple interpretations).
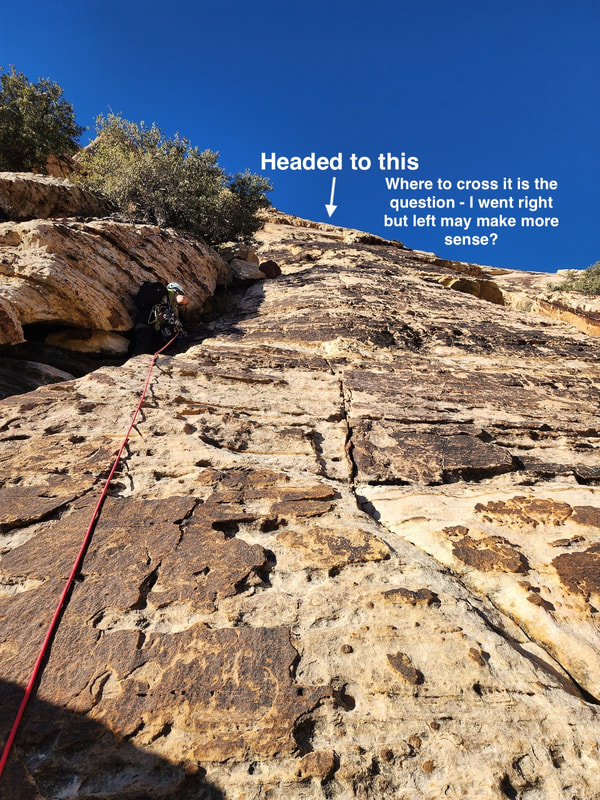
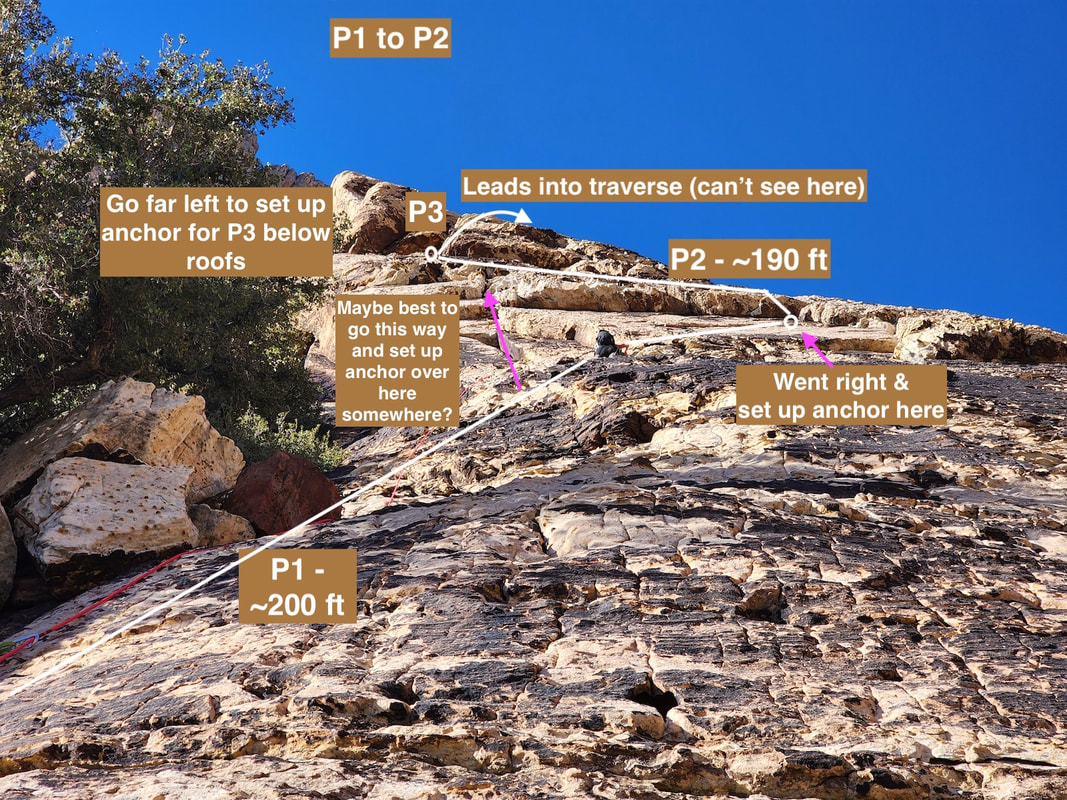
I (Stef) decided to go left along the rib and try to follow cracks for pro where possible. Eventually you end up on the broken face that has occasional (read - run-out) random cracks. You are heading towards the long, small roof. But the question of the day is where is best to set up the belay to cross the roof? Some descriptions indicated to go to the right side of the roof, which is the direction I went. There is a "stair-step" weakness in the roof on the right side. I stopped at a rare spot that had enough places to put more than one piece of protection (one of the pieces of pro was slinging a few small plates - you can see the sling in the P2 photo below with Rick in it). It was kind of an awkward small-ledgish-semi-hanging belay with less than inspiring rock. (The whole pitch had less than inspiring rock...) I was tempted to go to a weakness on the left side of the small roof that actually looked like it had a crack in it. In hind sight, that location would have set up better for the way Rick went on pitch 2. Without having done it, there is no way of knowing whether the crack was "real" or whether the weakness was comparable to get up and over. If we were to do the climb again, I would try that way. (P1 to P2 image below shows the left side option (pink arrow labeled "Maybe best to go this way?) |
Pitch 2 - (~190 feet)
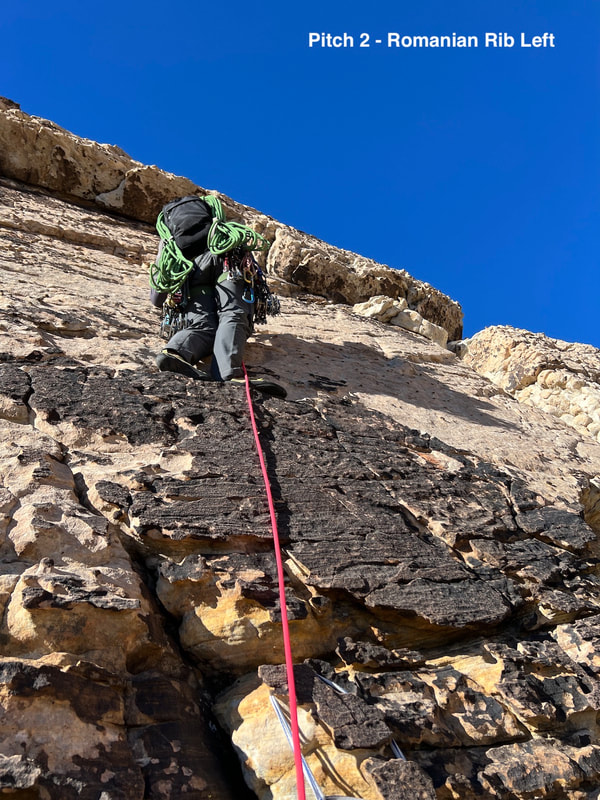
The first possible piece of pro after leaving the belay is under the roof. The rock is still pretty junky, so it's a bit heady to get to the roof.
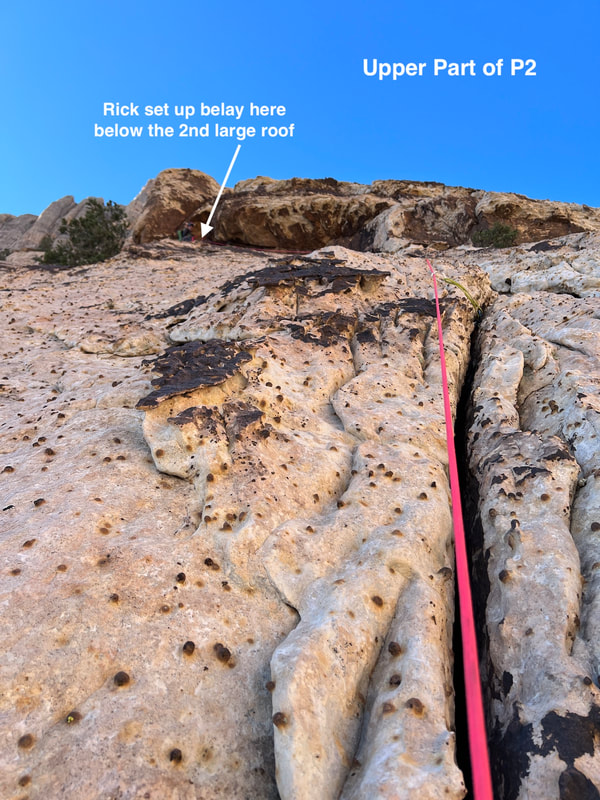
Once over the small roof, Rick headed left across the face, shooting for a series of large roofs. There was little-to-no protection above the first small roof for quite a ways. This pitch is the same type of jumbled mess with no clear line, on meh-rock with questionable pro. Some cracks do become available as you near the big roofs.
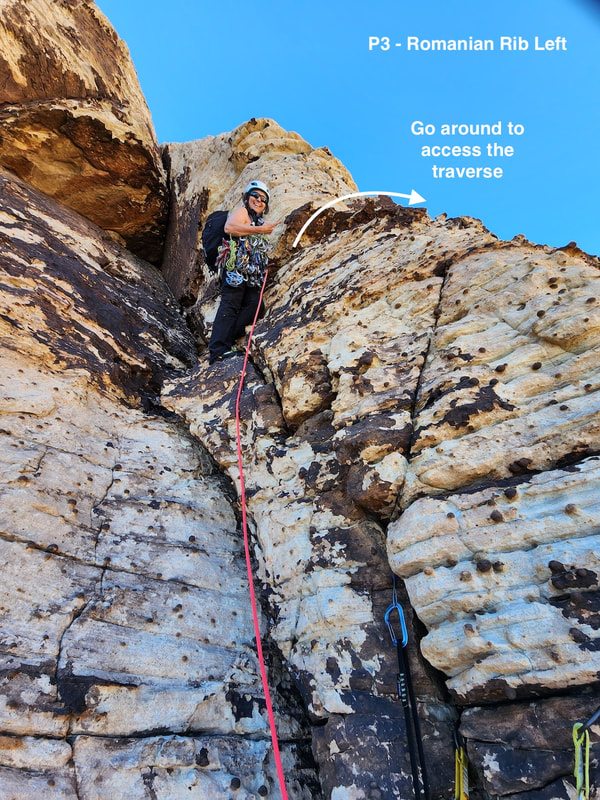
Rick set up a belay below the large roof because he ran out of rope and had bad rope drag. It may be best to climb up and around the Arete to set up the belay fo the traverse (see the labeled photo for pitch 3 with Stef and the arrow).
(Click on P2 photos to enlarge and see captions)
Pitch 3 - ~270 feet
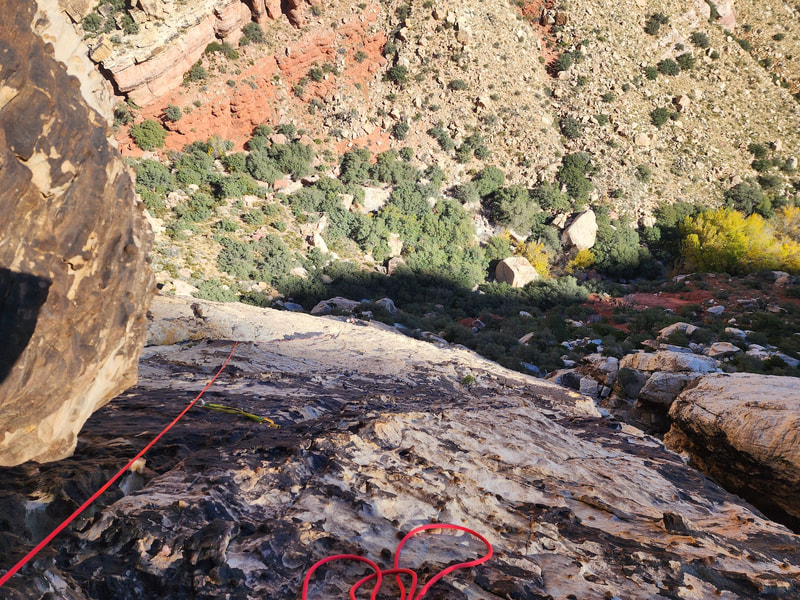
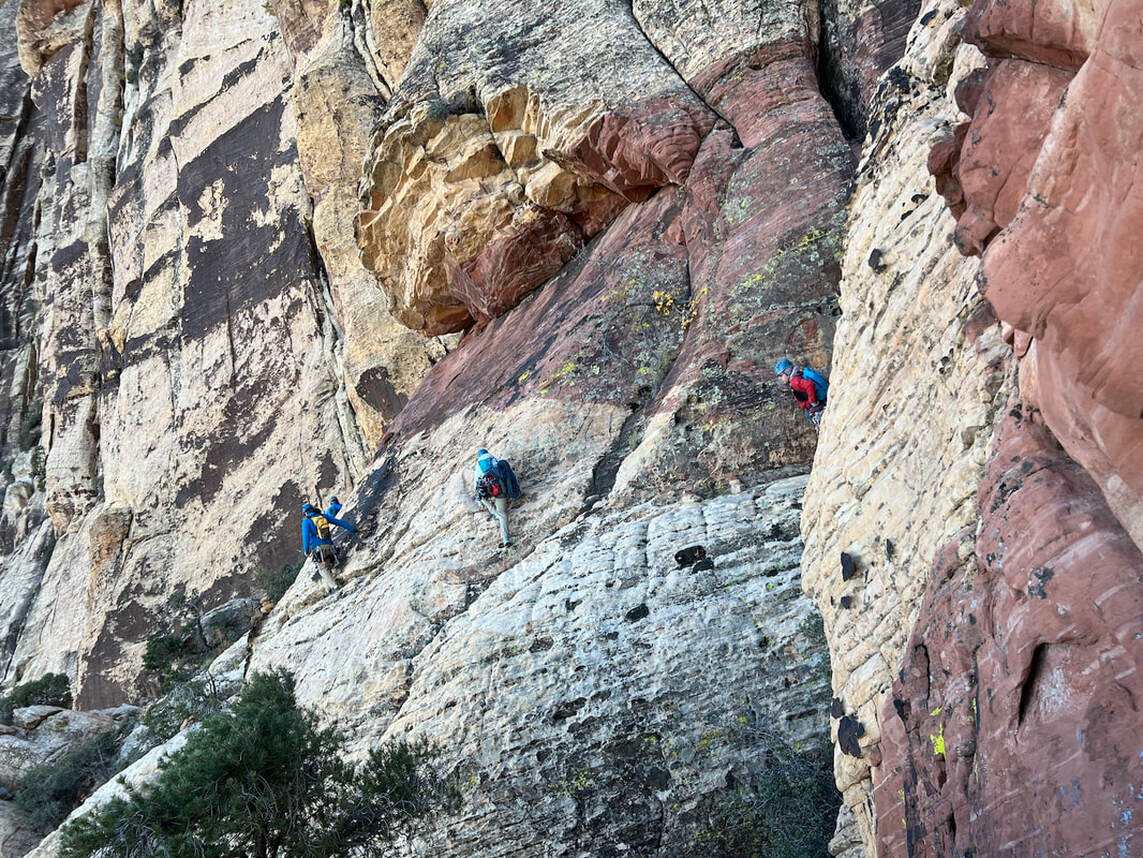
From the belay, go up and around the rib/arete. I placed one piece of protection after going around the corner and then extended it to minimize rope drag. This is the start of a long traverse. Usually it is good to place pro to protect the 2nd on a traverse, but I did not place any pro on the traverse - (1) because there weren't many options; (2) the options were down low and felt more dangerous to lean down than to keep traversing; and, (3) I wanted to minimize rope drag because you turn left to go up the crack.
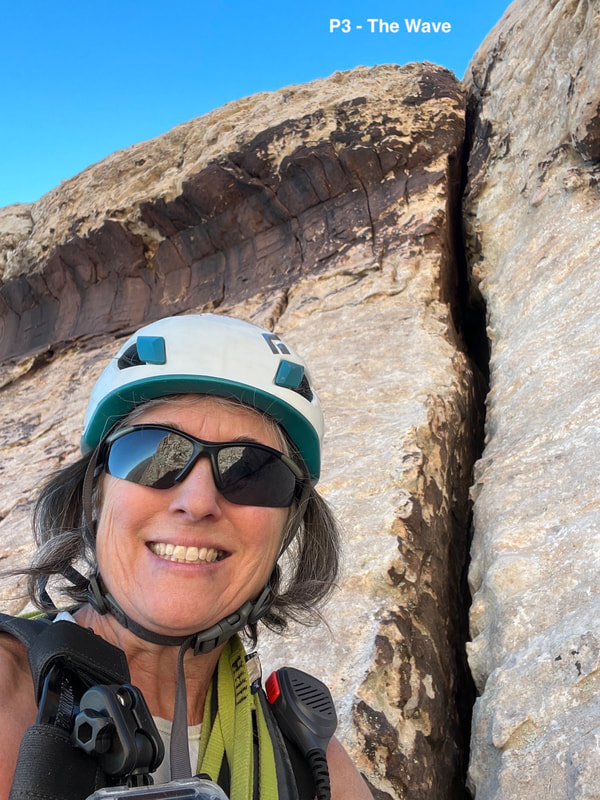
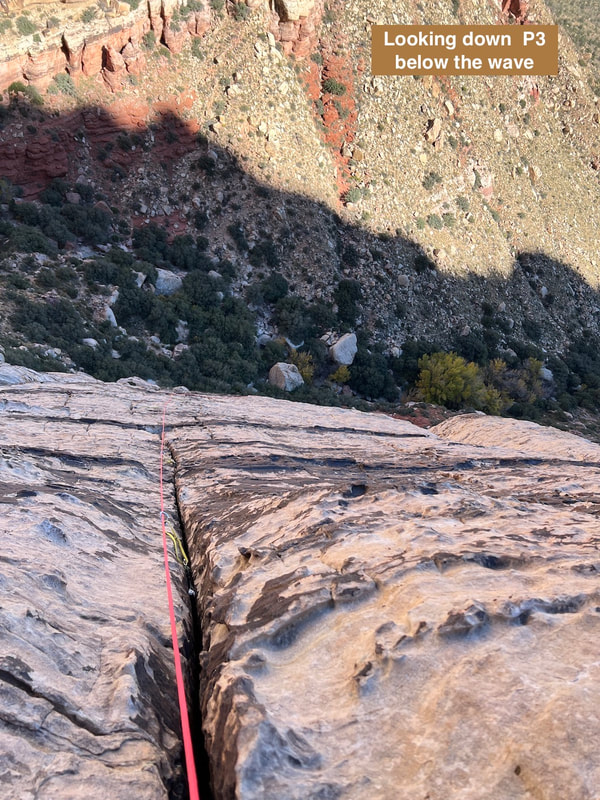
You will see a really nice crack come into view that extends below the wave. Eventually begin to angle up towards the crack. Be sure to use long slings to prevent rope drag as you angle up.
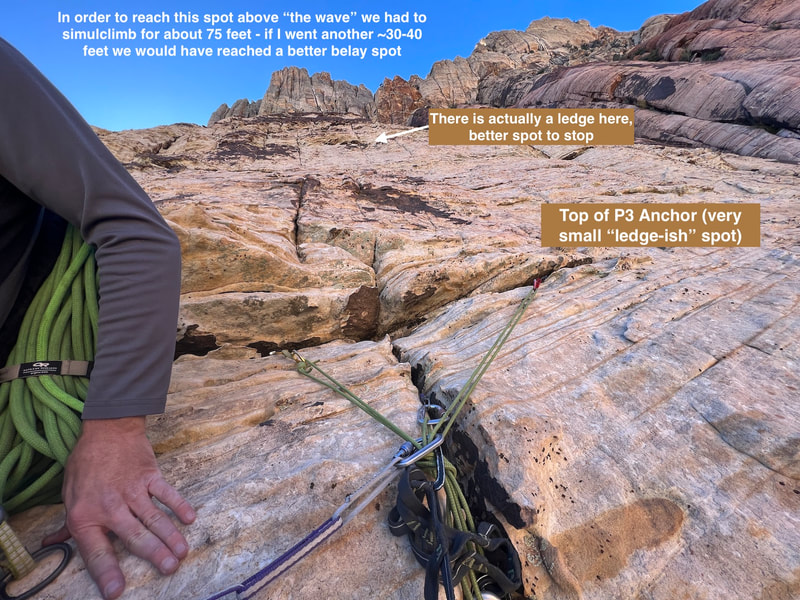
I (Stef) climbed above "the wave", this is where Rick started to simulclimb (walkie talkies HIGHLY RECOMMENDED!). We simulclimbed for about 75 feet. I stopped at a small "ledge-ish" spot (I couldn't recall where the ledge was so I stopped where I could place pro for an anchor). There is actually a larger, more comfy ledge another 30-40ish feet up.
(Click on P3 photos to enlarge and see captions)
Pitch 4 (~190 ft)
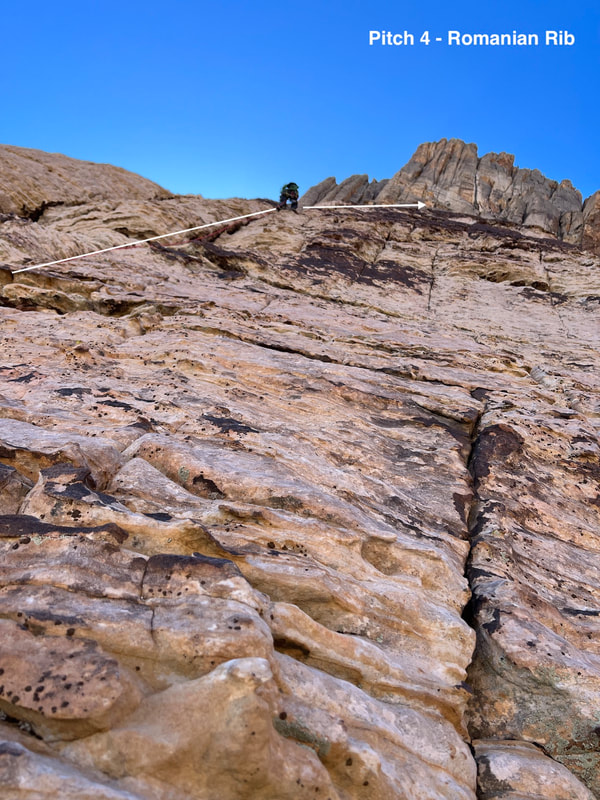
Just to the left of where we built the anchor for top of pitch 3/start of pitch 4 is a long crack. Go up that. Eventually the crack starts petering out and you will want to veer slightly right and up over dark, chunky petina.
Rick went just under 1 full 60 meter rope length then found a spot with a small ledge in the petina to belay.
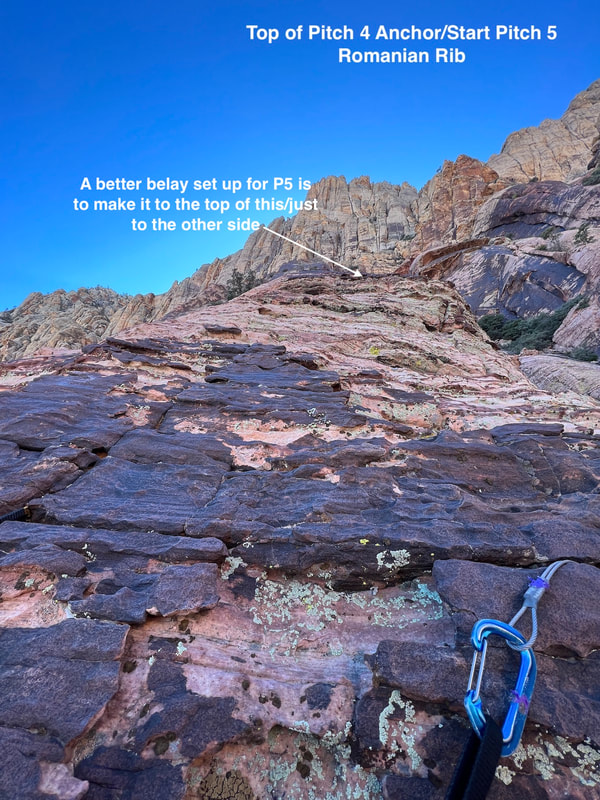
SUGGESTION: If you can, try to extend the pitch to make it to the top of the formation indicated in the photo "Top of Pitch 4/Start of Pitch 5" or down at the base of the next slab. This sets up for the next pitch better because from the top of this section (where the arrow is) it descends slightly, then the pitch 5 slab begins. For pitch 5, I (Stef) ended up having a lot of rope drag as a result of the undulation. Plus, the undulation caused so much extra rope to be "out" if I fell on the main slab of pitch 5, Rick probably would have not been able to feel the fall. I was basically climbing unprotected all the way up the main slab of P5.
Pitch 5 (~210 feet)
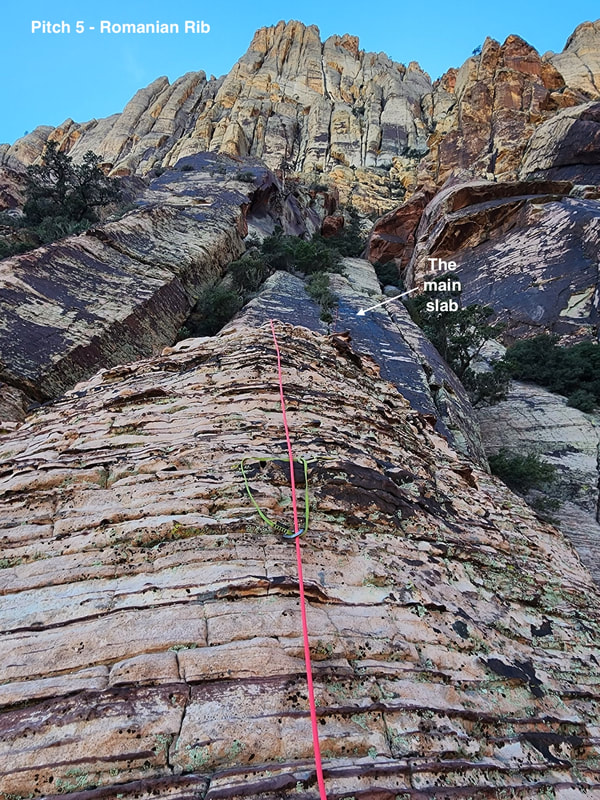
The main part of this pitch is the ruby colored patina-covered slab that has a crack all the way up the center and lots of bushes growing out of it.
As described above, it is best if this is set up as a pitch in and of itself when climbing the previous pitch. If 100% of this pitch is the "main slab" no simulclimbing is needed on this pitch. Because I had the extra distance at the start there was about 15-20 feet of simulclimbing.
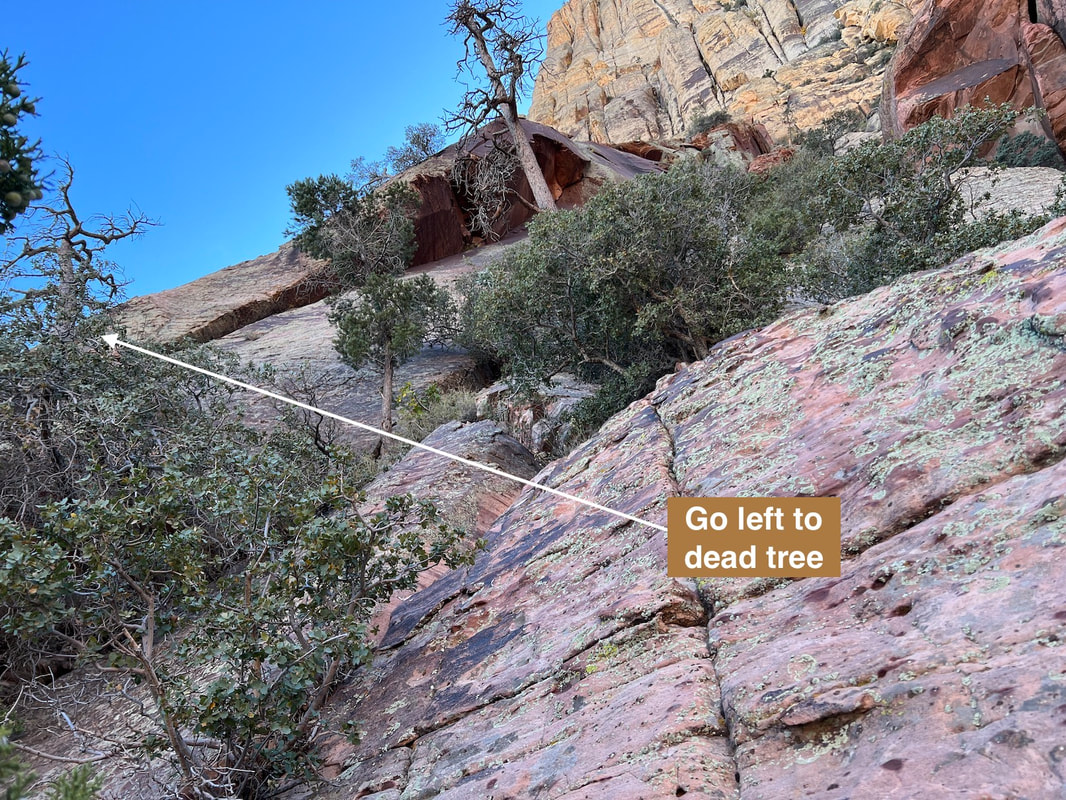
At the top of the "main slab" go left past bushes towards the lower dead pine tree. Set up a belay at the tree.
Pitch 6 - ~190 feet
|
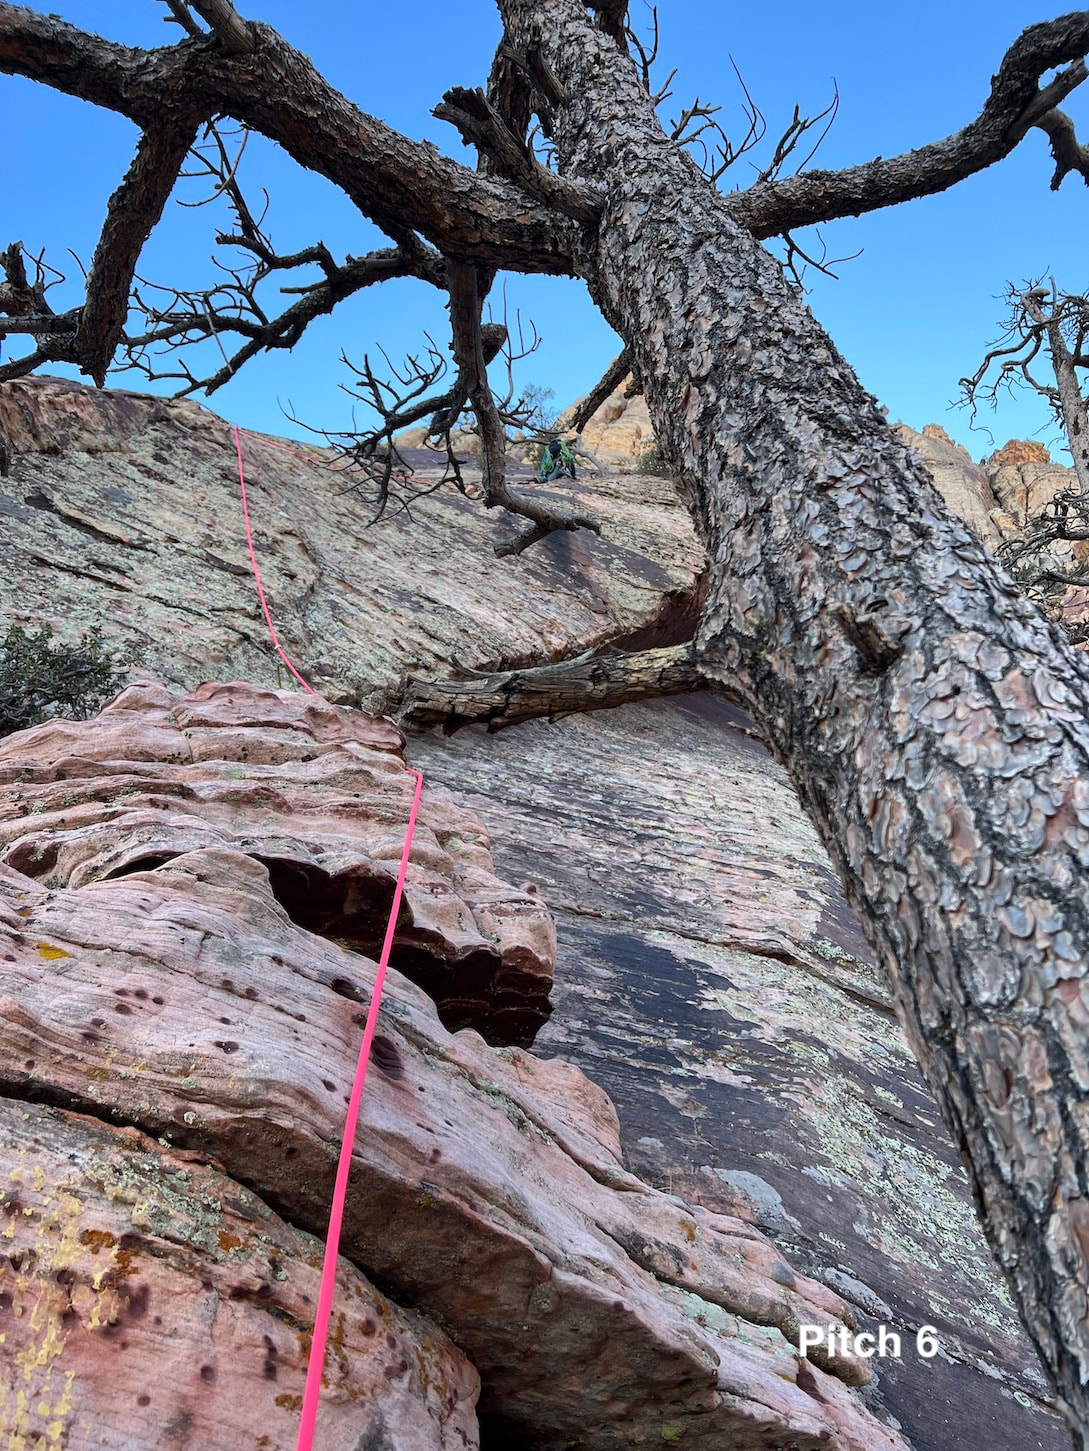
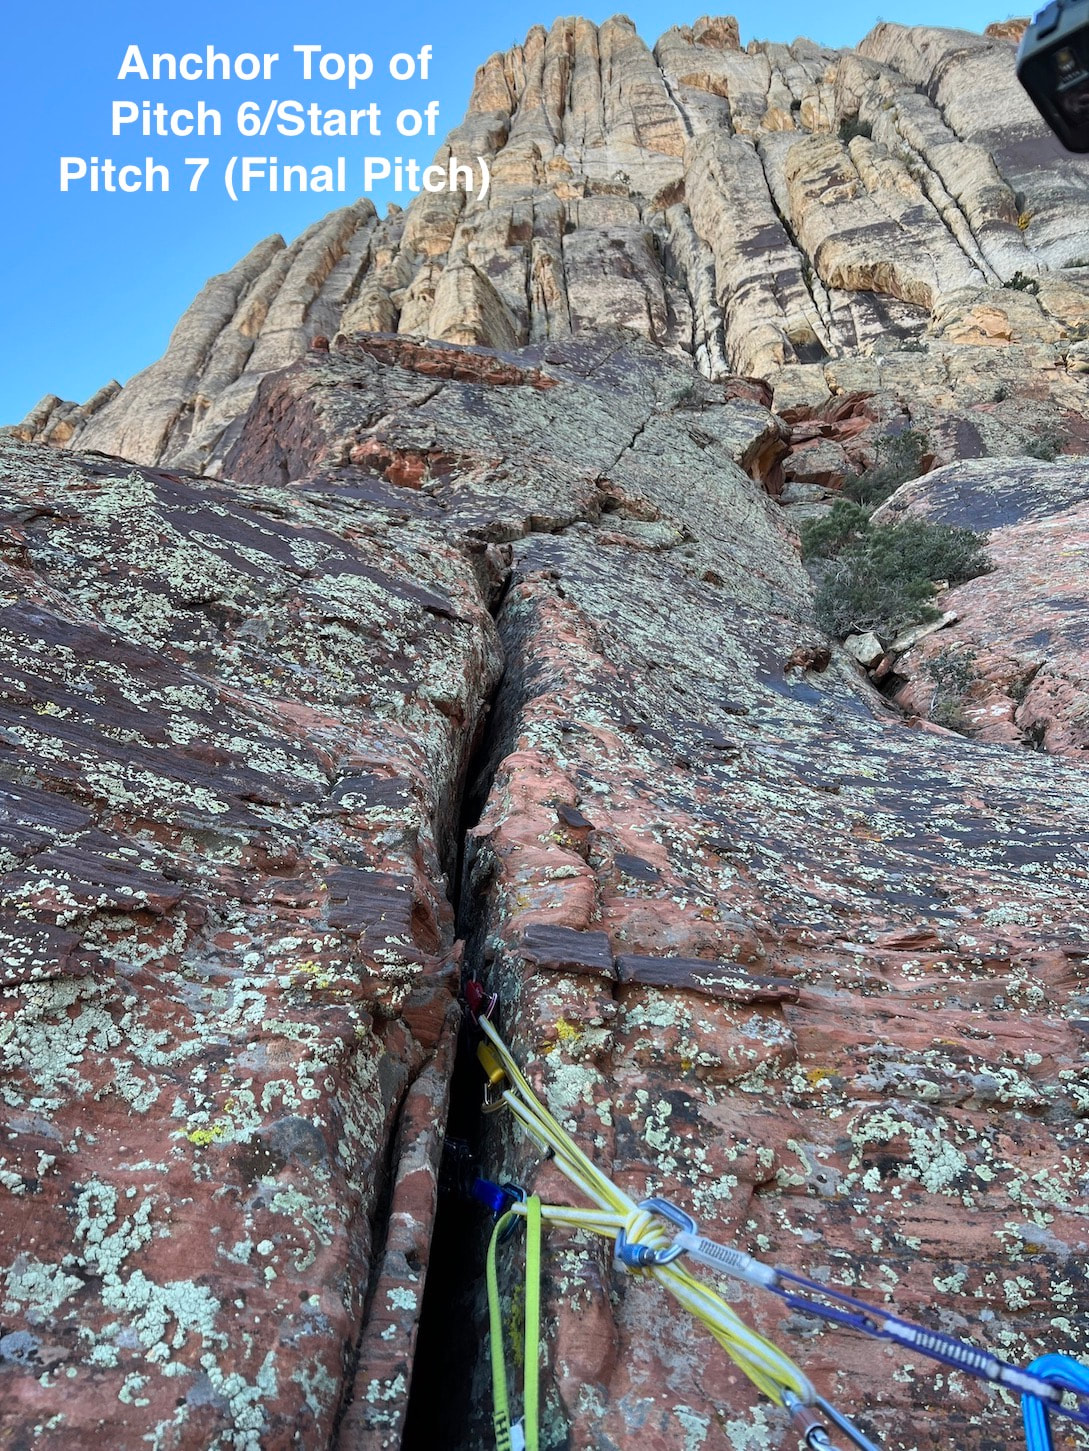
For pitch 6, the climb moves over onto the next intersecting rib. The climb goes up a minimally protectable face then follows a long, clear crack (past a small tree growing in the crack). Rick went just under another 60m rope length stopping at a small ledge and building an anchor in the main crack (see photo labeled "Anchor Top of Pitch 6/Start of Pitch 7 (Final Pitch).
|
Pitch 7
|
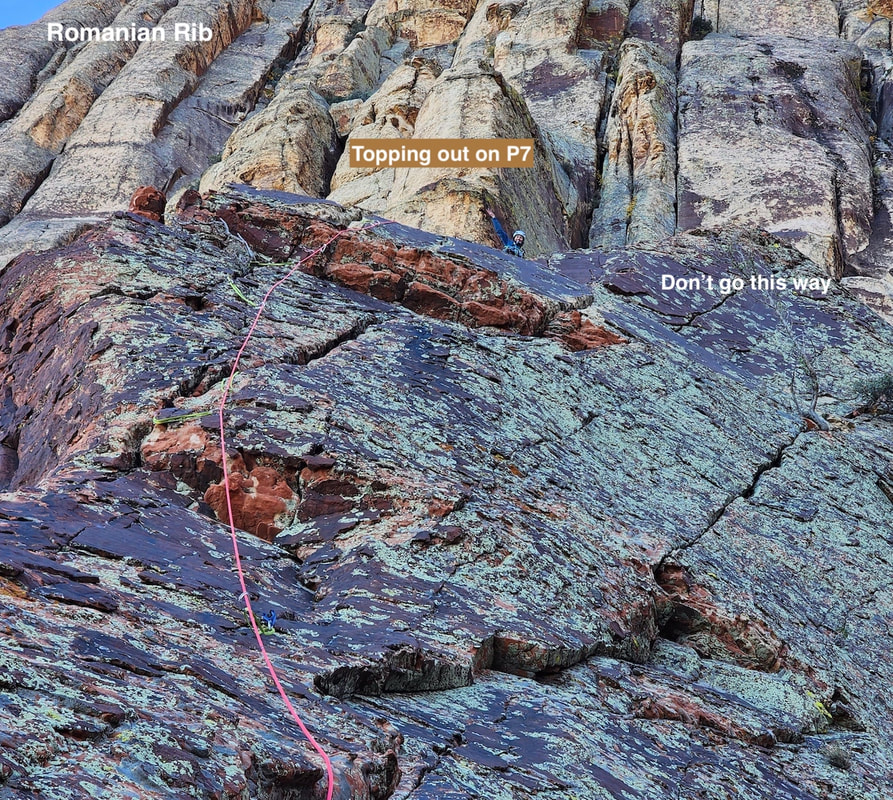
From the anchor follow the crack. When the crack starts arching right, veer left towards the small red roof. Above the roof the terrain flattens out - this is the top. The rib continues up and right, don't go this way.
Finding pro for the anchor is a little challenging. Go back from the edge, get a good piece in somewhere, and consider hip belaying (maybe backup with an assisted braking device). The terrain is low angle and your climber is going to move quickly, it might be difficult to keep up with a traditional belay-from-above set-up. From here, head back towards the gully. Scramble down, then turn right up the gully (see descent description). |
The Descent
The descent is long and complex. Plan for at least 4 hours from when you get off the climb and back at your car. There is a way to do the descent using a single rope - you would have to scramble between rappel stations. We have only done the descent using doubles, so that is what we share here.
Scramble to the Rappel
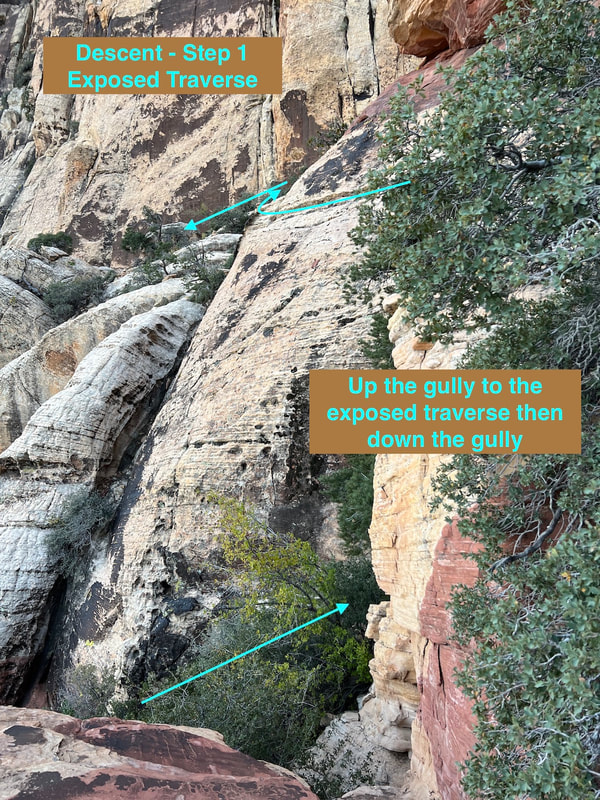
When you get off the climb, you will see some cairns stacked near white rock marking the exposed traverse. You will go up the gully a short ways to access the traverse. Getting onto and off the traverse are the most awkward moves. There are spots for protection, so it is possible to belay for safety.
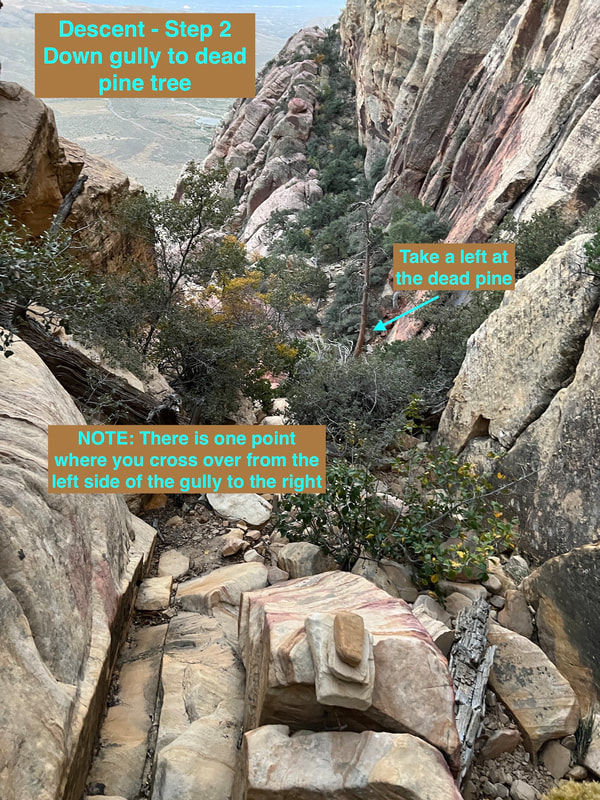
After the exposed traverse, it is easy scrambling. You will see some cairns marking a cross over point moving from the gully you are in, climbing over and down into another gully. From this gully scramble down to a large dead pine tree. Go left below this pine tree to the bolted anchors on hiker's left (rappeler's right).
After the exposed traverse, it is easy scrambling. You will see some cairns marking a cross over point moving from the gully you are in, climbing over and down into another gully. From this gully scramble down to a large dead pine tree. Go left below this pine tree to the bolted anchors on hiker's left (rappeler's right).
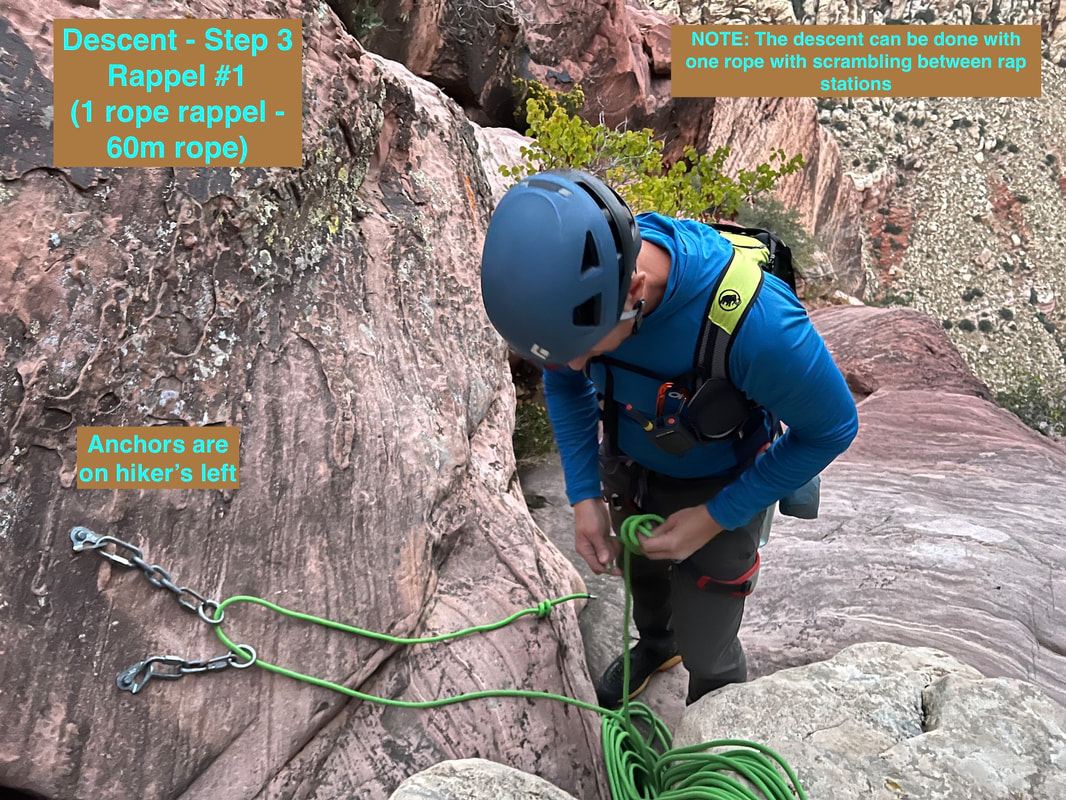
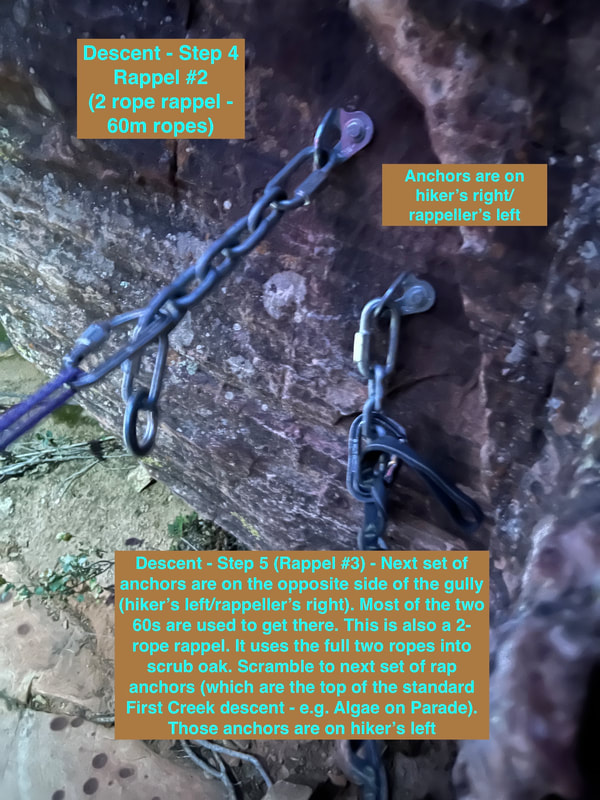
Rappel 1 - Chains below dead pine tree - Single Rope
The first rappel is a single rope rap. As you rappel, you are looking for chains that will be on your left side (rappeler's left).
Rappel 2 - Double Rope
Rappel using double ropes. Follow the slabby-V to the next set of chains. These are on rappeler's right.
Rappel 3 - Double RopeFrom the chains, rappel down to the shrubs. This uses almost the full 60 meters of double ropes. Walk about 100 feet down through the shrubs to the the upper standard First Creek Slabs descent (e.g. this is the first rap station for Algae on Parade). Look for the anchors at a drop off on hiker's left (rappeler's right).
|
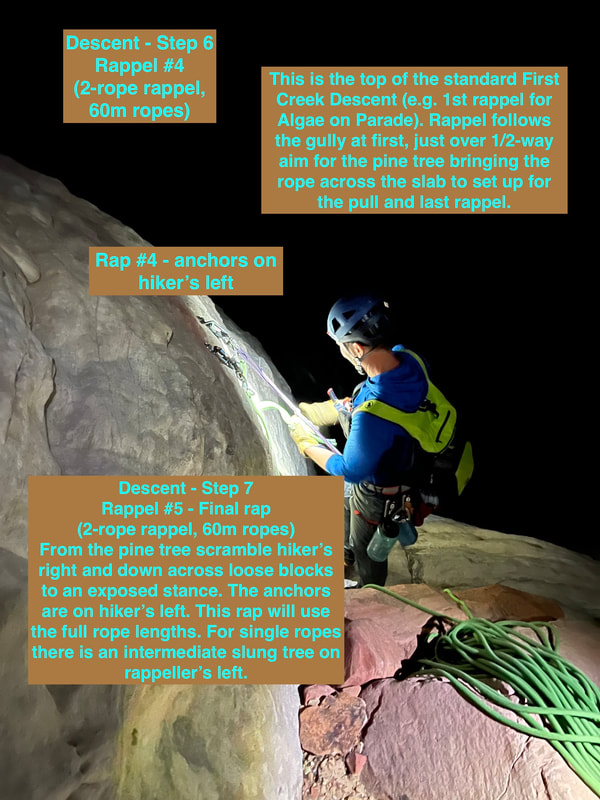
Rappel 4 - Double Rope
The natural line for this rappel is following down the gully, but about 1/2 to 3/4 of the way down, you want to bring the rappel over onto the slabby face and aim for the pine tree in the middle of the ledge. This will set you up for a clean pull and make get you closer to the next rappel station.
Rappel 5 - Double Rope
From the pine tree, scramble off hiker's right/rappeller's left over some loose blocks. Look for the next set of anchors on hiker's left side. These are exposed and awkward to access because of the loose blocks (you can avoid the blocks by going right around them, but it is exposed), be ready to clip in with your PAS. This rappel will use 100% of your 60m doubles - depending on rope stretch, sometimes you have to untie the knots at the end and rappel off of the ends. There is usually a small, smelly pool of muck at the bottom of this rappel. Good luck not getting your ropes wet in the nastiness :-). Sometimes we have celebratory success. Other times, womp womp. (For those doing single rope rappels, there is a mid-point rappel at a slung tree on rappeller's left.)
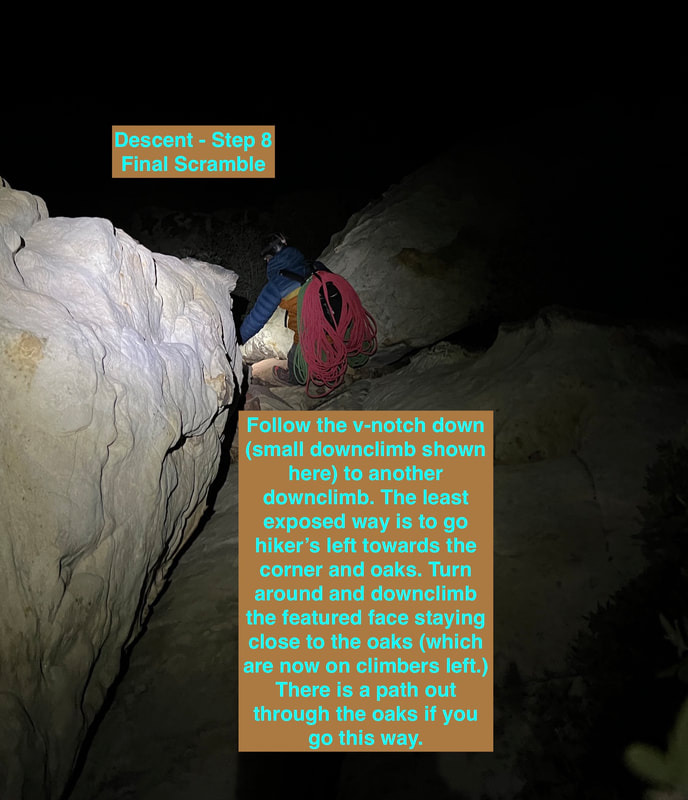
Downclimb or Short Rappel to Bottom
Below the nasty pool is a v-notch where you can do two short down-climbs to reach the base. On the second down-climb, I go hiker's left of the oak trees (if facing the wall it is to the right of the oak trees) and then turn around, face the wall and down-climb close to the oak trees (which would be on climber's left as you face the wall, basically hugging the trees on your left side.) There seems to be a few more features here and the mental security of the trees.
If you are tired and want to play it safe, you could place your rope around (or sling with a leave-behind carabiner) the small tree for a short single rope rappel. The best line for this goes to the opposite side of the oak trees than the downclimb (when rappelling/facing the wall the oak trees would be on your right). This would give a cleaner pull for the rope.
You are now near the base of the climb of Rising Moons. There is more scrambling/down climbing needed to reach the trails. There are numerous options for this, all ending up in similar places. In one section, if I'm tired and feeling clumsy, I opt to booty-scoot and stem down a low-angled chimney then exit left on a small ledge. This avoids the 15-foot down-climb on the left side of the block that forms the "chimney." The down-climb on the left side is featured, just awkward getting into.
Climb Stats to Date
|
DATE OF CLIMB: November 11, 2023
WALLS HIT: 1 NUMBER OF 5.7 CLIMBS: 1 NUMBER OF PITCHES: 7 NUMBER OF FALLS: 0 NUMBER OF TAKES: 0 VERTICAL FEET CLIMBED: ~1300' TOTAL CLIMBS SO FAR: 192 TOTAL PITCHES SO FAR: 263 TOTAL 5.7 VERTICAL FEET ON THE TOUR SO FAR: 26,405 NUMBER OF CLIMBS REMAINING: 70 (out of 262 - more climbs keep getting added - someday we will put a hard cap on it!) VERTICAL FEET REMAINING: 29,652' DIRTY UNDERWEAR ENCOUNTERED TODAY: 1 DIRTY UNDERWEAR ENCOUNTERED TO DATE: 9 |
FALLS SO FAR:
|
|

